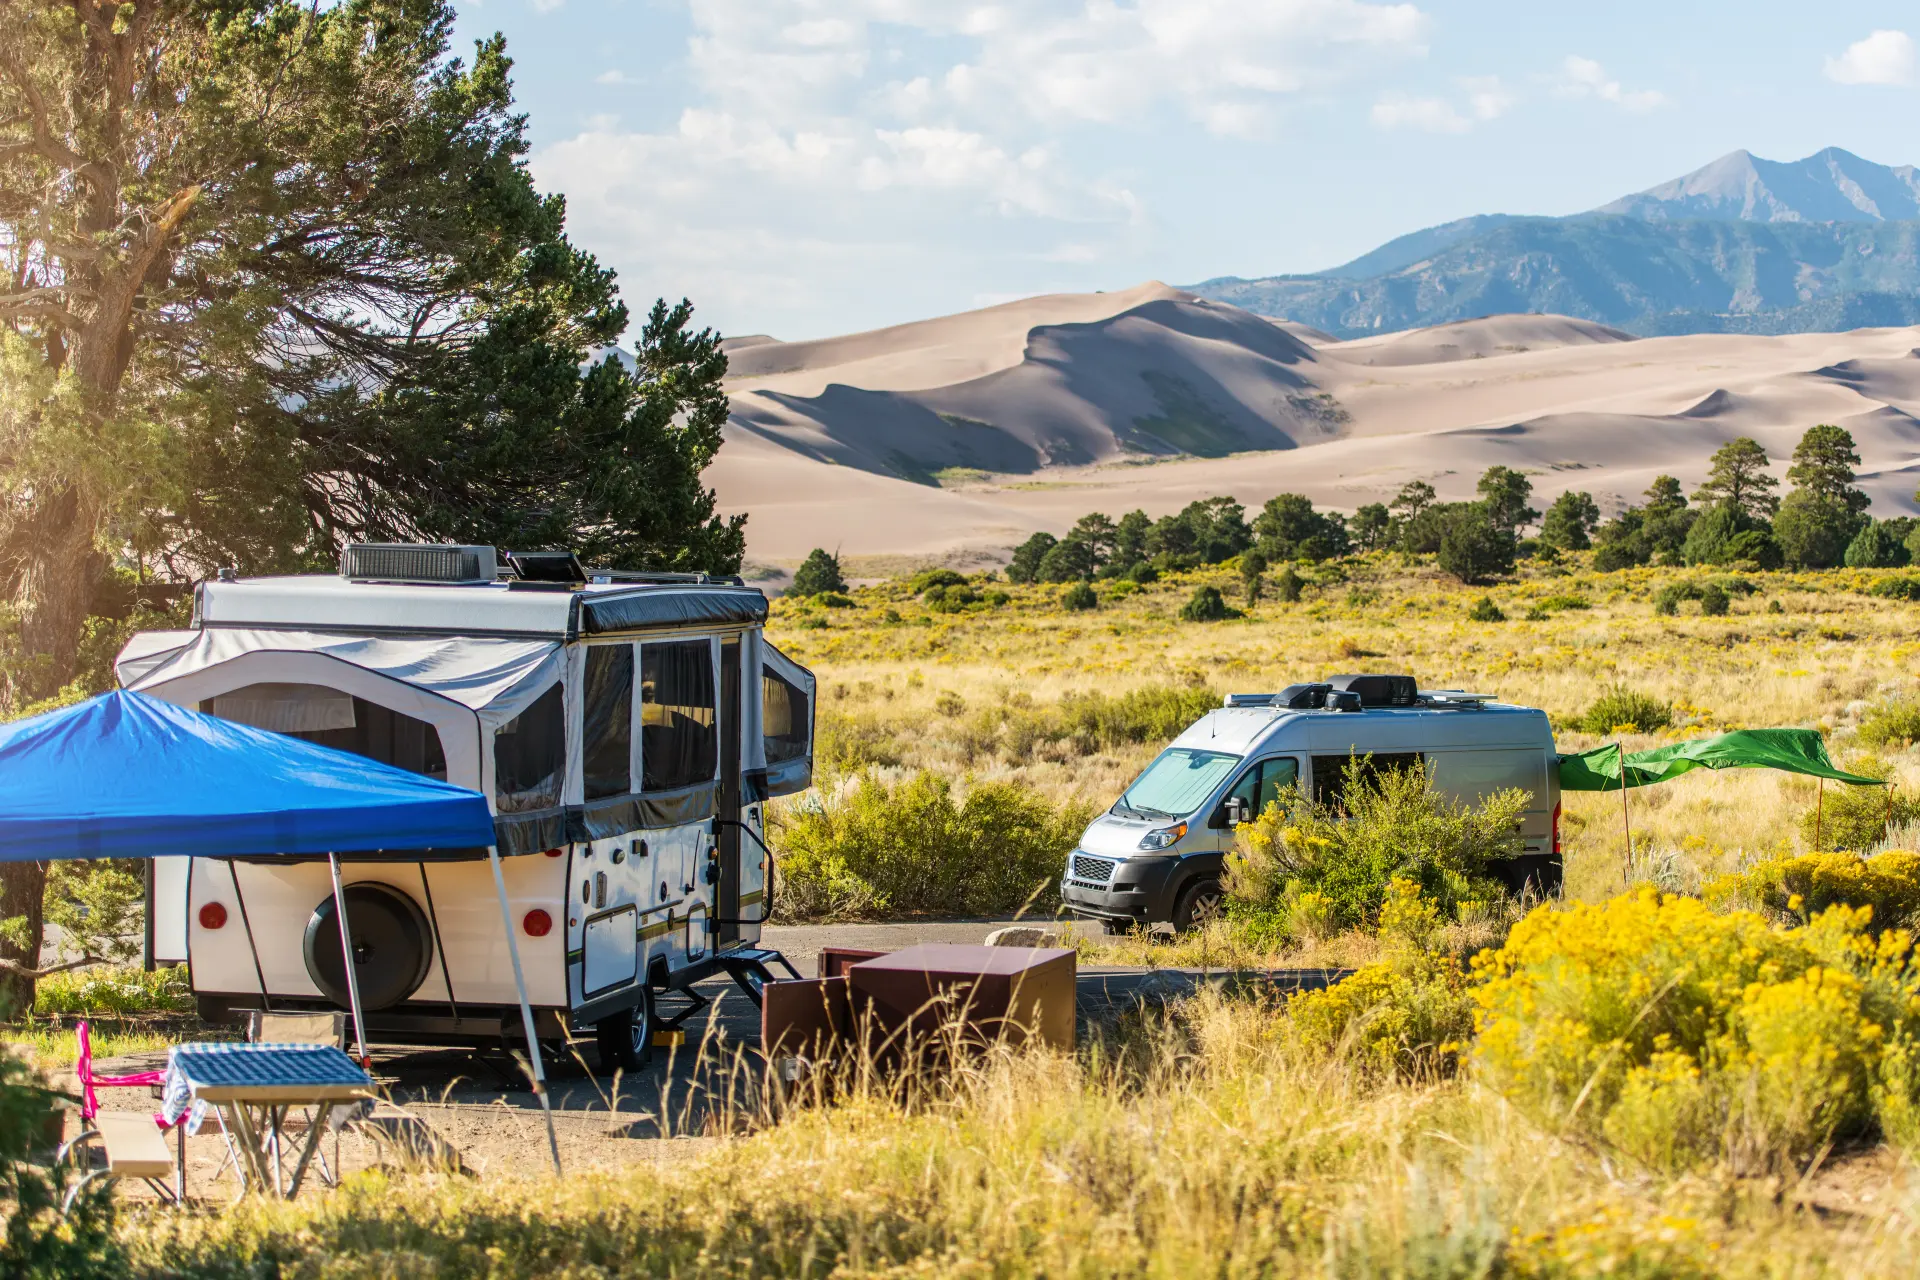
You’re tired. The nearest campground is full, or maybe you just don’t want a campground – you want solitude, a sky full of stars, and zero neighbors fighting over the fire pit.
So you pull off the road, park somewhere quiet, and spend the night completely off the grid. That’s dry camping in a nutshell, and I’ve been hooked on it for years.
But there is a lot more to it than the idyllic representation above, and that is exactly what I will cover in today’s article, including the nitty and the gritty – as well as plenty of advice. Let’s jump right in!
What is Dry Camping?
Dry camping is the art of camping without the comforts of water, septic tanks, and electricity. It means roughing it in a parked car, van, truck, RV, or tent – completely disconnected from modern amenities and utility hookups.
Whether you’re an outdoors enthusiast who’s never camped without conveniences before, or a seasoned camper looking for extra tips, this is your go-to guide for dry camping.
Dry Camping Tips: Your Ultimate Checklist
I’ll cover each of these in depth further down, but here’s a quick reference summary to keep in mind before you set out:
- Choose your spot and duration wisely – Car, RV, or designated camping grounds?
- Know the rules for where you’re camping – On BLM land, dispersed camping is generally limited to 14 days within any 28-day period.
- Be mindful of restricted areas – Watch for signs prohibiting overnight parking, especially when traveling at night.
- Pack the essentials – Gather all necessary gear for a comfortable and safe stay.
- Inspect your shelter – Check your tent for holes and fix them before setting off.
- Get permission for private property stays – For overnight stays, always ensure you have the owner’s consent.
- Beware of high water areas – If camping near a river, lake, or creek, stay at least 200 feet away and avoid areas marked “high water.”
- Plan for waste disposal – Use black tanks or dig a cathole at least 6–8 inches deep, 200 feet from any water source.
- Bring a power source – Solar panels, a portable power station, or a generator keeps things running.
- Store extra water – With no piped-in water, plan for additional water storage and know how to purify what you collect.
- Stay connected – A cell phone booster can be a lifesaver in remote locations.
- Follow Leave No Trace principles – Pack out all trash, minimize your footprint, and leave the site better than you found it.
Also read: What to Bring Camping.
Dry Camping – All the Things to Consider
If you want to go more in-depth with each of the recommendations above (and more), read on.
Powering Your Campsite: Batteries, Solar Panels, and Inverters
When you disconnect from the grid, you need alternative power sources – and your options have gotten a lot better in recent years. I personally love the flexibility that a solid solar setup gives you. Consider packing:
- Rooftop solar kits for RVs (systems now range from a few hundred watts up to 1,000+ watts). Read my article on the best portable solar chargers here.
- Portable solar panels in various wattages (40, 80, or 120 watts), which are great for tent campers or van lifers
- A lithium iron phosphate (LiFePO4) battery – these have become the standard for dry campers because of their long lifespan, safety, and ability to discharge deeply without damage
- A pure sine wave inverter to power standard electronics and appliances safely
Portable power stations – all-in-one units combining battery, inverter, and charging ports – have become incredibly popular for dry campers who don’t want to wire a full system.
Brands like Jackery, EcoFlow, and Bluetti now offer units capable of powering a mini-fridge for a full day or more. It’s worth looking into if you want simplicity over raw capacity.
Whatever you choose, remember to use energy-efficient appliances and conserve power whenever possible. LED lighting, low-draw fans, and 12V-optimized appliances make a real difference in how long your batteries last.
Cooking with Sunshine: Solar Oven
I’ll admit, solar cooking takes some patience, but I find it genuinely satisfying. Solar ovens capture the sun’s rays and convert them into heat for cooking your meals.
On a clear day, they can reach temperatures of 250–350°F – more than enough for most camp meals. A bonus: they help keep your RV or tent cooler during hot weather because you’re not adding heat inside.
And if you want some extra inspiration, make sure to read my article sharing the best camping food ideas.
Clothing and Footwear
Pack a variety of clothing and footwear for comfort and protection from the elements. Don’t forget essentials like extra socks and weather-appropriate outerwear – these seem obvious until you’re shivering at 2am wondering why you only brought one fleece.
A sleeping bag is a must for most dry camping scenarios. Keep yours in top shape – you can read here how to wash a sleeping bag. And if you’re a bigger person who struggles to find a good fit, check out my guide to the best sleeping bags for big people.
They might not be everyone’s cup of tea, but one of the recommended boonie hats here will surely come in handy!
Environmentally Friendly Waste Management: Composting Toilet
Ditch the “stinky” black tank by installing a composting toilet in your RV or van. This waterless, eco-friendly option lets you extend your stay off-grid without the hassle of dumping sewage.
I’ve used one extensively and the difference in convenience – especially on longer trips – is hard to overstate. Cassette toilets are another solid option if a full composting unit isn’t practical for your setup.
And if you’re a female camper, make sure to read my Shewee Device Review – it’s a life saver!
Stay Cool and Comfortable: Automatic Temperature Vent Fan
An automatic temperature vent fan regulates your RV or van’s interior temperature and keeps you cool throughout your stay.
Fans like the Maxxair Maxxfan are a staple in the dry camping community for good reason – they run efficiently on 12V power and can make a 95°F afternoon genuinely tolerable. It’s one of those upgrades I’d never go without.
Never Run Out of Power: Generator Backup
An automatic generator start ensures your refrigerator and other essential appliances stay powered during your trip.
Set your battery bank to trigger the generator at a low voltage threshold so your batteries don’t drain completely – that protects their lifespan and keeps you from waking up to a dead system.
Just be mindful of noise restrictions and generator hours if you’re near other campers.
Stay Connected: Cell Phone Booster
Don’t let poor network service ruin your trip. A 4G/5G cell phone booster guarantees far more reliable connectivity, even in remote locations.
Brands like WeBoost and SureCall are well-regarded in the RV community and can mean the difference between a useful signal and nothing at all.
If you’re working remotely or just want peace of mind in an emergency, this is one of the best investments for serious dry campers.
Save Water: Faucet and Shower Head Aerators
Conserve water by installing low-flow faucet and shower head aerators in your RV. You’ll be able to shower and wash dishes without depleting your water supply nearly as fast. It’s a small, cheap change that makes a noticeable difference when you’re 5 days into a trip and watching your fresh tank level.
Water Storage and Management
Having separate water tanks is essential for efficient water management during your camping trip. The typical RV setup uses three tanks:
- Fresh water tank – for clean drinking and cooking water
- Grey water tank – for used water from washing dishes or bathing
- Black water tank – for toilet waste
Know your tank capacities before you leave and plan your trip duration accordingly. Running out of fresh water two days in – or running out of grey tank space – is the kind of thing that turns a fun trip into a frustrating one fast.
Light Up the Night: Solar Lights and Flashlights
Pack solar-powered lights for your campsite perimeter and a water-resistant flashlight as your go-to handheld. Solar garden lights are cheap, lightweight, and surprisingly effective – I scatter a few around my campsite and never have to fumble in the dark.
A good headlamp is equally important; I’d rather have two and never need the backup than have one fail at midnight.
Energy-Efficient Lighting: LED Lights
LED lights reduce energy consumption by up to 90% compared to traditional incandescent bulbs. For an RV or van, replacing interior lighting with LED bulbs is one of the best bang-for-your-buck upgrades you can make.
Go for a warm white (2700K–3000K) or neutral white (4000K) color temperature – the cool blue-white LEDs are harsh in a small living space.
Ensuring Safe Drinking Water: UV Water Purifier
A UV water purifier kills bacteria, viruses, and other pathogens in your drinking water in seconds. USB-rechargeable models are easy to use and highly effective.
I always use a pre-filter first to remove sediment and debris – UV light works best in clear water. For more detail on water safety, read my previous article on how to purify water with bleach, or check out the best water purification tablets here.
And on that note: never collect rainwater without purifying it first. Using a tarp funnel to collect rainwater during a storm is a great supplemental water source, but treat it before drinking.
Where to Find Dry Camping Spots
One of the most common questions I get from new dry campers is: “But where do you actually go?” And it’s a fair one, because it’s not always obvious.
The biggest resource is public land – specifically land managed by the Bureau of Land Management (BLM) and the US Forest Service (USFS).
Most BLM land allows dispersed camping unless an area is posted “Closed to Camping” or has specific conservation restrictions. That’s an enormous amount of land across the western United States in particular.
There are also several apps and websites that make finding spots much easier than it used to be. I use a combination of them depending on where I’m headed:
- Freecampsites.net – one of the largest user-submitted databases of free camping spots, with reviews and GPS coordinates
- Campendium – great for RVers, with cell signal ratings and detailed campsite reviews
- iOverlander – popular with overlanders and van lifers for off-the-beaten-path locations
- The Dyrt – a comprehensive camping app with both free and paid camping options
- OnX Offroad / Gaia GPS – excellent for mapping and understanding land boundaries before you head out
Always confirm land ownership and any local restrictions before camping. What looks like open land on a map can be private property or a protected area.
When in doubt, call the local BLM or Forest Service office – they’re generally happy to point you toward good spots.
Know the Rules: BLM and Dispersed Camping Regulations
This section trips up a lot of new dry campers, so I want to be very clear about it.
On BLM land, dispersed camping is generally limited to 14 days within any 28-day period. Once you hit your stay limit, you need to move – and in most areas that means relocating at least 25 to 30 miles away.
After the 28-day window, you can return to the same area. Rules vary by state and local field office, so always verify with the specific office that manages the land you’re planning to camp on.
A few other rules worth knowing:
- Vehicles must stay on designated roads and trails unless the area is specifically designated for off-road use
- Don’t leave personal property unattended for more than 10 days (state-specific limits may vary)
- Most areas don’t require permits, but some regions require campfire permits – California is a notable example
- Fire restrictions change seasonally, so always check current conditions before you go
- Human waste must be buried in a cathole 6–8 inches deep, at least 200 feet from any water source, trail, or campsite. In some sensitive or high-use areas, you’ll need to pack it out entirely
The BLM’s website (blm.gov) is your best official reference for current regulations by region.
Also read, just in case: Best Bowie Knives or Best Bushcraft Knife.
Leave No Trace!
Dry camping – especially boondocking on public land – has exploded in popularity over the last decade. More people than ever are heading out to remote areas, and the impact is real.
I’ve arrived at spots I loved a few years ago only to find them trashed, or worse, closed permanently because of irresponsible use.
The Leave No Trace principles aren’t just suggestions; they’re the difference between keeping these places accessible and losing them.
The basics: camp on already-disturbed surfaces when possible, pack out everything you pack in, stay at least 200 feet from water sources, and bury human waste properly (or pack it out if required).
Make sure campfires are completely extinguished before you leave and never leave them unattended.
I take this seriously. If everyone who dry camps follows these principles, these spots stay open for all of us. If they don’t, they get closed. It’s that simple.
The Different Types of Dry Camping
Dry camping can take on many different forms. You might have come across terms like boondocking, overnight parking, independent parking, and wild camping – and while these are often used interchangeably with dry camping, each has its own nuances.
Boondocking
The term “boondocking” originates from the Filipino word “bundok,” meaning “mountain.”
It’s often used to describe a remote location far from civilization – and that’s a good starting point, though the definition has broadened over time.
Today, boondocking generally refers to camping without hookups in any location – whether that’s remote BLM land, a Walmart parking lot, or a rural side road. The defining feature isn’t the landscape but the absence of utility connections.
It’s one of the most popular forms of dry camping, and for good reason: it’s free, flexible, and often puts you in spectacular places that campgrounds can’t match.
A related term worth knowing is dispersed camping – this specifically means boondocking on public land (BLM, National Forest) outside of developed campground areas. All dispersed camping is boondocking, but not all boondocking is dispersed camping.
Overnight Parking
Ever found yourself on a long road trip and needed to rest for the night? Overnight parking is the act of sleeping in your car, van, or RV – usually due to circumstance rather than planned adventure.
Maybe you’re on a nighttime drive and need to rest before continuing, or you’re between destinations and a campground isn’t practical. Park in a well-lit, safe spot and always check local ordinances – many cities prohibit overnight vehicle sleeping.
Independent Parking
If you’re on a dry camping adventure and plan to use any available facilities – a rest stop bathroom, a store, a public shower – then you’re engaging in what some call independent parking. It’s about making the most of what’s around you while staying off the official grid.
Wild Camping
Although some people use “wild camping” as a synonym for dry camping, it more specifically refers to camping in a wild environment – the wilderness, woods, or mountains – without any hookups or developed facilities.
Wild camping often comes with its own set of regional laws, particularly in the UK and Europe where the term is more commonly used. In the US, it largely overlaps with dispersed camping on public land.
If you decide to opt for wild camping, ensure that you have brought one of my recommended odor-proof bags with you!
Are You Packed and Ready for Your Adventure?
No matter which type of dry camping you choose – boondocking, overnight parking, wild camping, or something in between – going in prepared makes all the difference.
I’ve had dry camping trips that were absolute disasters because I underestimated water needs or forgot a key piece of gear, and I’ve had trips that were the best nights of my life precisely because I was ready for whatever came up.
The essentials: clothing for all weather, sleeping pads, solar lights, batteries, sleeping bags, water accessories, tents (if needed), power sources, footwear, and camp kitchen gear.
Beyond the gear, know the rules for where you’re camping, follow Leave No Trace, and treat every site like you want to come back to it – because you probably will.
Stepping out of your comfort zone and experiencing life away from home is genuinely rewarding. You’ll save on expenses, find places most people never see, and come back with stories worth telling. Happy camping.
If you’d prefer a more traditional camping experience, a good place to start is my previous article on what to bring camping for the entire family.

Daniel is a gear freak when it comes to hiking, climbing and camping. He went to REI Outdoor School to meet new people and learn best practices. Don’t even try to argue with him about the latest backpack or ice axe, he tried most of them. Daniel’s dream is to climb Mount Everest.