

The tomahawk holds a unique place in human history. Originally developed by Native American tribes for hunting, cutting, and warfare, this versatile tool has evolved far beyond its indigenous roots. Today, tomahawk throwing has experienced a remarkable renaissance, transforming from a forgotten historical weapon into a thriving recreational activity enjoyed by thousands worldwide.
Whether you’re a prepper looking to expand your outdoor skillset, a hunter seeking new challenges, or simply someone fascinated by precision weapons, tomahawk throwing offers an engaging blend of physical skill, mental focus, and genuine fun. But here’s the truth: mastering this skill requires more than enthusiasm. It demands proper technique, the right equipment, and dedicated practice.
This comprehensive guide will walk you through everything you need to know, from selecting your first tomahawk to competing at national levels. If you’ve ever wondered whether you could master this ancient skill, the answer is simple: yes, you can. And we’ll show you how.
Editors note: This article was updated September 2026
Part 1: Safety First, The Non-Negotiables
Before you pick up a tomahawk, before you find your target, before anything else, understand this: tomahawk throwing is inherently dangerous if practiced incorrectly. Treating safety as an afterthought isn’t an option.
Creating a Safe Throwing Environment
Location Requirements are the foundation of safe practice. Choose an area completely isolated from people, pets, and buildings. Your backyard works only if it’s completely private and fenced. Forest clearings, dedicated ranges, and open fields are ideal choices. Never practice near roads, pathways, or public areas. Ensure a clear 360-degree perimeter of at least 30 feet from your throwing area.
Distance Matters significantly to your safety plan. Maintain at least 50 feet of clear space behind your target. Keep spectators at least 30 feet away from your throwing line. Never allow children or untrained individuals in your practice area. Establish a clear “hot range” signal (like archery ranges use) if others are nearby.
Essential Safety Equipment and Practices
Wear closed-toe shoes with good ankle support (not sandals or flip-flops). Clear the area of obstacles, debris, and trip hazards before beginning. Remove all distractions before throwing, such as phones (silenced), music, or conversations. Never retrieve tomahawks while someone else is in the throwing area. Establish a retrieval protocol where one person throws and everyone else stays back until retrieval is complete.
Keep a first aid kit nearby and know basic wound treatment. Consider liability carefully: if on private property you don’t own, get written permission. Maintain focus throughout your practice session. Never throw when tired, distracted, or under the influence of any substance.
Part 2: Choosing the Right Tomahawk
Beginners often make the critical mistake of grabbing whatever tomahawk looks impressive. This is exactly backward. Your first tomahawk should be chosen deliberately and thoughtfully.
Understanding Tomahawk Types
Throwing Tomahawks are purpose-built for one thing: precision throwing. These models feature optimized weight distribution (typically 1.5-2 lbs) and shorter handles (12-16 inches). They come with single or double-bladed heads, have lower moment of inertia for faster rotations, and are designed for consistent stick rates. Throwing tomahawks are best for beginners, practice, and competitions.
Tactical Tomahawks serve as multi-purpose tools combining cutting and utility functions. These models feature heavier construction (2-3+ lbs) and longer handles (18-24 inches). They’re built for chopping, prying, and climbing with increased leverage for utility tasks. However, they’re less forgiving for throwing precision. Tactical tomahawks work best for camping, survival, and hunting applications.
Equipment Comparison Table: Throwing vs. Tactical Tomahawks
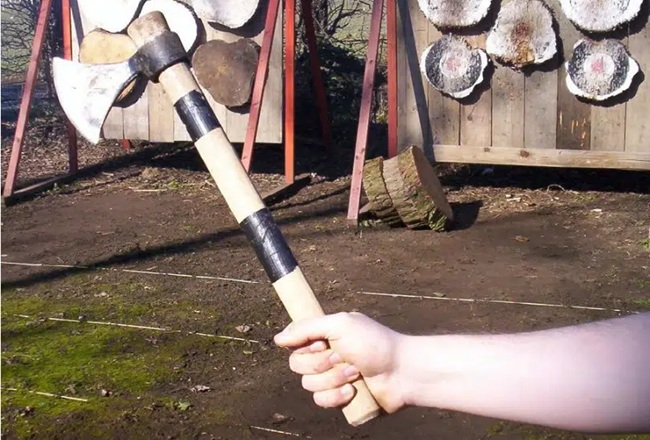
| Feature | Throwing Tomahawk | Tactical Tomahawk |
|---|---|---|
| Weight | 1.5-2 lbs | 2.5-3.5 lbs |
| Handle Length | 12-16 inches | 18-24 inches |
| Blade Type | Single/Double optimized | Heavy duty |
| Rotation Speed | Faster | Slower |
| Throwing Distance | 30-45 feet | 20-30 feet |
| Stick Rate | High (85%+) | Moderate (60-70%) |
| Best Skill Level | Beginner-Advanced | Intermediate+ |
| Price Range | $30-$80 | $50-$150 |
| Multipurpose Use | Limited | Excellent |
Blade Head Shapes Explained
Single-Bladed Head designs feature one striking edge. This option is lighter in weight, better for precision, and easier for beginners. However, single blades are less forgiving on off-angle throws.
Double-Bladed Head designs feature two striking edges, which increases hit probability significantly. They’re slightly heavier than single blades and better for competitive throwing. Double heads are more forgiving for imperfect rotations and are the highest recommendation for serious practice.
Specialized Heads with Spike or Flat Back additions provide extra utility features like breaking and prying. These add complexity to throwing, work best for advanced throwers, and are ideal for hybrid throwing and utility use.
Key Selection Criteria
Match Your Height and Reach carefully when selecting a tomahawk. Shorter people (under 5’6″) should choose 12-14 inch handles. Average height (5’6″ to 6′) work with 14-16 inch handles. Taller people (over 6′) need 16-18 inch handles.
Prioritize Light Weight for throwing practice. Select tomahawks in the 1.5-2 lbs range maximum. Lighter tomahawks create faster rotations and more control. Heavier tomahawks provide momentum but reduce precision. Save the heavier models for tactical use.
Invest in Quality construction from the start. Budget throwing tomahawks cost $30-$50. Mid-range models (recommended) run $50-$80. Premium competition models reach $80 and above. Don’t compromise on balance and construction quality.
Research Materials carefully before purchasing. Carbon steel blades offer the best balance of durability and sharpness. Stainless steel requires lower maintenance and easier care. Handle materials vary, with hickory wood being traditional and fiberglass being more durable.
Part 3: Setting Up Your Target Practice Area
Ideal Target Construction
Best Target Wood selection starts with understanding what works. Dead wood or recently fallen trees are softer and easier to stick into. Tree rounds 4-6 inches in diameter work well. Tree stumps (18-24 inches tall, freshly cut) are also suitable. Avoid pressure-treated or painted wood (health hazard). Hardwoods like oak are durable but harder to stick into. Softwoods like pine are ideal for practice.
Target Setup requires proper mounting on a sturdy base. Use a weighted, bolted, or secured base that won’t shift. Height should position the target center at 4-5 feet from ground. Ensure the target won’t topple from impact. Consider a rotatable stand to distribute wear evenly.
Backing Support is essential for safety. Place backing behind the target to catch missed throws. Use thick plywood or additional wood rounds. Secure everything so impacts don’t shift the setup unexpectedly.
Refresh your targets regularly to maintain stick rates. Replace targets every 50-100 throws. Worn wood becomes harder and increases splinting risk. Damaged wood creates unpredictable stick rates and reduces learning effectiveness.
Safety Features for Your Range
Clear the impact zone of all obstacles and debris. Install perimeter fencing if practicing in a backyard area. Use high-visibility markers around the throwing area. Paint a clear throwing line using chalk, tape, or scored dirt. Install backstop protection for added safety. Mark distance markers at 10-foot intervals for practice progression.
Part 4: Mastering the Fundamentals
The Proper Throwing Stance
Forget everything you’ve seen in movies or read in fiction. Those depictions are uniformly wrong. The correct stance starts with standing upright and relaxed. Position your feet shoulder-width apart. Keep your knees slightly bent (not locked). Distribute your weight evenly. This isn’t a martial arts stance, so relax completely.
Position Your Feet Like a Baseball Pitcher for proper technique. If throwing right-handed, position your left foot slightly forward. If throwing left-handed, position your right foot slightly forward. Your shoulders should face the target. Your front foot points toward target, and your back foot sits at a 45-degree angle.
Keep Your Core Engaged throughout the motion. Your power comes from your whole body, not just arms. Maintain neutral spine alignment. Engage core muscles for stability. This positioning prevents injury and increases power generation.
The Critical Grip: More Important Than You Think
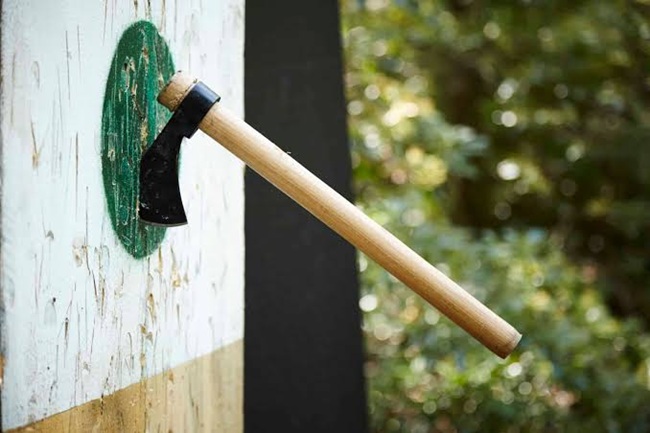
This is where most beginners fail. The grip directly affects the tomahawk’s rotation, accuracy, and stick rate. Understanding proper grip technique is essential for success.
Hold at the Base of the Handle consistently. Never grip the middle or top of the handle. Your hand should be 2-3 inches from the bottom. This leverage point is crucial for proper release and control.
Thumb Position is the game-changer that most people get wrong. Place your thumb on the SIDE of the handle (not on top or back). This positioning controls spin rate directly. If thumb is on the back, the tomahawk spins too much. If thumb is on top, the tomahawk spins insufficiently. The side placement equals balanced rotation.
Finger Arrangement matters for consistency. Wrap your remaining four fingers around the handle securely. Maintain a relaxed but firm grip. You’re not strangling it (tension causes control issues). You’re also not too loose (loose grip causes unpredictable release).
Wrist Alignment is non-negotiable for accuracy. Keep wrist straight (not bent up or down). Wrist bending causes spin errors. Practice the grip without throwing until it feels natural to you.
Grip Troubleshooting
| Problem | Cause | Solution |
|---|---|---|
| Tomahawk rotates too much | Thumb on back | Move thumb to side |
| Tomahawk doesn’t rotate enough | Thumb on top | Move thumb to side |
| Can’t control release | Gripping too tight | Relax your grip |
| Tomahawk flies off unpredictably | Grip inconsistent | Practice grip daily |
| Wrist pain after throwing | Wrist bending during throw | Keep wrist locked straight |
Part 5: The Step-by-Step Throwing Technique
Establishing Your Throwing Line
Before your first throw, prepare your workspace properly. Find Your Distance by standing 5-8 paces (15-25 feet) from your target. This is beginner-appropriate distance. As you improve, extend to 25-40 feet gradually.
Mark Your Throwing Line using chalk, tape, or by scoring a line in dirt. Stand with toes on this line consistently. This ensures repeatable positioning across all your throws.
Aim Your Feet properly for consistent stance. Point your front foot directly at target. Position back foot at 45-degree angle. Adjust until this positioning feels natural to you.
The Complete Throwing Motion (5 Steps)
Step 1: The Ready Position starts your throw sequence. Stand facing your target. Position your feet in proper pitcher stance. Hold the tomahawk at your side. Position the blade facing your target. Approach the throw completely relaxed and focused.
Step 2: The Raise begins the motion. Raise the tomahawk straight back in one smooth motion. The blade should point DOWN toward the ground (not up). Raise to roughly ear or shoulder height. DO NOT raise too quickly (loss of control). Keep arm path consistent, training your groove.
Step 3: The Arm Extension continues the motion. As you raise the tomahawk, extend your throwing arm. Drive from your shoulder, not your elbow. Keep arm straight but not locked rigid. The motion should feel smooth, not jerky. Your arm is now fully extended back.
Step 4: The Forward Drive provides power to the throw. Explosively extend your arm forward toward the target. Drive from the large muscles (chest, shoulder), not just arm. Maintain locked wrist throughout. Release the tomahawk at the moment of maximum extension. The handle should leave your hand naturally, not be forced.
Step 5: The Follow-Through completes your motion. Continue your arm motion after release. Your arm should finish across your body. Follow-through prevents injury and improves power. Complete the motion fully without stopping abruptly. This motion trains proper muscle memory.
Release Timing: The Critical Element
Most throws fail because of improper release. The tomahawk must leave your hand at the exact moment of peak arm extension.
How to Nail Release Timing requires understanding the mistakes. Too early release means tomahawk flies backward or sideways. Too late release means tomahawk drops straight down. Perfect release occurs at maximum arm extension with the tomahawk traveling straight toward target.
Practice Drill technique: Do 10 practice swings without releasing. Focus on when your arm reaches full extension. Feel the natural release point. Only after 10 swings, release on the 11th. This trains muscle memory for proper timing.
Part 6: Improving Your Accuracy and Distance
Common Problems and Solutions
Problem: Tomahawk Doesn’t Reach Target
Likely Causes include insufficient arm speed. You might have weak follow-through. Raising tomahawk too quickly (losing control) is another cause. Standing too far from target too soon could be the issue.
Solutions include focusing on explosive arm motion. Complete full follow-through. Slow your raise while smoothing your extension. Return to 15-foot distance and rebuild from there.
Problem: Tomahawk Reaches Target But Won’t Stick
Likely Causes include incorrect rotation rate. The tomahawk might be hitting wood at wrong angle. Soft target wood could be too saturated or hard. Insufficient spin might be the culprit.
Solutions include adjusting your grip (thumb position is critical). Verify blade angle (perpendicular at impact). Replace target wood regularly. Increase arm speed for better rotation.
Problem: Throws Are Off-Track (Missing Completely)
Likely Causes include blade that isn’t perpendicular to target at release. Your stance might be inconsistent. Aiming might be off. Your arm path varies between throws.
Solutions use the Gravity Alignment Trick. Loosen your grip slightly (don’t release). Let the tomahawk naturally fall with gravity. Gravity straightens a top-heavy object naturally. Observe where the blade points. Adjust hand position to correct misalignment.
The Swing Practice Drill works effectively too. Complete 5-10 practice swings (no release). Focus on arm motion and blade orientation. Notice if blade aligns with your leg (good) or away from it (bad). Adjust grip and stance until aligned. Then execute the throw.
The Stance Check uses video recording. Record your throws on video. Compare your foot position between throws. Ensure consistency in stance. Small stance variations cause large accuracy errors.
Problem: Throws Are Consistently Left or Right
Likely Causes include body angle that’s inconsistent. Your arm motion might not be straight. Shoulder rotation (opening hips too early) could cause this. Blade offset from grip axis might be the issue.
Solutions include recording videos from behind (shows body alignment). Focus on keeping your body still until release. Drive from center of your body. Verify blade is perfectly centered in your hand.
The Practice Progression Framework
Week 1-2: Foundation (Distance: 15 feet)
Your goal is consistent 6-8 successful sticks out of 10 attempts. Focus on proper stance, grip, and smooth motion. Success metric is tomahawk rotating smoothly to target.
Week 3-4: Consistency (Distance: 20 feet)
Your goal is 8-10 successful sticks out of 10 attempts. Focus on repeatable motion and release timing. Success metric is predictable rotation rate.
Week 5-8: Accuracy (Distance: 25-30 feet)
Your goal is 9+ successful sticks out of 10 attempts. Focus on precision aiming and blade alignment. Success metric is accurate blade angle at impact.
Week 9-12: Distance (Distance: 35-45 feet)
Your goal is maintaining accuracy while extending distance. Focus on power and control balance. Success metric is accurate sticks at longer ranges.
Part 7: Advanced Techniques for Experienced Throwers
Multiple Rotation Throws
Once you’ve mastered the half-rotation throw, advanced practitioners explore additional techniques. The 1.5 Rotation Throw completes 1.5 spins before hitting target. It requires greater distance (40+ feet). It demands consistent power and timing. It’s used primarily at distance competitions.
2+ Rotation Throws are competition-only techniques. They require extensive practice and skill. They’re used to demonstrate mastery. They’re not practical for most recreational throwing.
How to Progress: Master consistent 0.5 rotation at 25 feet first. Extend to 30 feet, maintaining consistency. Increase arm speed slightly (not excessively). Observe rotation count at impact. Gradually increase distance to add rotations.
Two-Handed Throwing
Advanced throwers sometimes practice dual-handed techniques. Benefits include developing ambidexterity. This approach balances physical strength. It adds versatility for competitions.
Implementation: Master dominant hand completely first. Spend equal time developing non-dominant side. Use lighter tomahawks when learning new hand. Expect 2-3 weeks to develop muscle memory.
Blind Throws and Moving Targets (Competition Techniques)
Elite competitors practice advanced challenges. Blind throws use eyes closed, relying on muscle memory. Moving targets involve small targets or targets in slight motion. Rapid-fire accuracy requires multiple throws in quick succession. Trick shots use unusual angles or unconventional techniques.
These are advanced skills developed only after complete mastery of fundamentals.
Part 8: Mental Game and Training Psychology
Developing Consistency Through Mental Focus
Tomahawk throwing is as much mental as physical. Develop a Pre-Throw Routine that works every time. Take three deep breaths to calm your nervous system. Visualize the perfect throw for mental rehearsal. Feel the motion without moving to activate muscle memory. Execute the throw with confidence and commitment.
This 10-second routine trains your brain to perform under any condition.
Dealing With Performance Anxiety
Competitive throws often fail due to mental factors, not technique. Overthinking is a common problem, so trust your training rather than conscious thought. Performance pressure exists, but remember why you started (it’s fun!). Fear of missing happens, but missing is part of the process. Distraction is inevitable, so develop your pre-throw routine to filter distractions.
Tracking Progress
Keep a practice log for accountability. Record date, time, and distance. Count number of attempts versus successful sticks. Calculate your success rate percentage. Note what felt good or bad. Track distance extended by each week.
Over weeks and months, watching your percentage improve is powerfully motivating and reveals patterns in your technique.
Part 9: Getting Involved in the Wider Community
Finding Tomahawk Throwing Ranges
Professional tomahawk throwing ranges exist in most major cities. What to Expect includes professional instruction availability. Safe, properly maintained facilities are guaranteed. Competition opportunities are available. You’ll find a community of fellow enthusiasts. Classes for all skill levels are offered.
How to Find Ranges: Search “tomahawk throwing range near me” online. Check Google Maps for “axe throwing” locations. Contact local archery clubs (often host throwing). Ask at outdoor recreation centers. Check Meetup.com for tomahawk throwing groups.
Cost: Drop-in sessions run $20-$40 per person per hour. Class packages cost $50-$150 for multi-week courses. Annual memberships range from $100-$400.
Competitive Throwing: Pathways to Competition
Local Competitions are hosted by ranges and clubs. These are friendly, low-pressure environments. They’re good entry points for beginning competitors. Prizes often include free range time or equipment.
National Competitions: The International Knife Throwers Hall of Fame hosts the premier tomahawk throwing competitions. The Annual World Championship is held each year with divisions by skill level. The IKTHOF Circuit offers regional qualifying events. Specialty Events cover distance, accuracy, speed, and freestyle categories.
Organizing Friendly Competitions: Host your own tournament with friends. Create divisions (beginner, intermediate, advanced). Set clear rules (distance, number of throws, scoring method). Establish safe protocols (spectator areas, retrieval process). Award prizes (small but meaningful, bragging rights count!). Have fun (this is the point).
Typical Competition Scoring: Successful stick equals 1 point. Closest to center (if no stick) equals 0.5 points. Multiple rotations (if attempted) earn bonus points. Total of 10 throws per competitor.
Part 10: Maintenance, Care and Safety Long-Term
Blade Maintenance
Keeping Your Tomahawk Sharp requires regular attention. Sharpen blades every 50-75 throws. Use a whetstone or professional sharpening service. Dull blades don’t stick (increase stick failures). Sharp blades create cleaner cuts (easier maintenance).
What NOT to Do: Don’t leave blades embedded in wet wood (rust risk). Don’t store outside (weathering damages blade). Don’t throw at rock or metal (shatters blade edge).
Handle Care
Wood Handles require inspection regularly for cracks. Oil periodically (linseed oil works well). Replace if cracked (safety hazard). Sand lightly if rough.
Fiberglass Handles need minimal maintenance. Inspect for cracks or splinters. Clean with soapy water. They won’t need replacement for years.
Storage
Proper Storage keeps your equipment safe. Store in cool, dry location. Hang with blade pointing down (safety). Keep away from children. Store in locked case if needed.
Conclusion: Your Tomahawk Throwing Journey
You now possess the knowledge to safely, properly, and progressively develop real expertise in tomahawk throwing. But knowledge without action remains theoretical.
Your Next Steps: Get equipped by purchasing a proper throwing tomahawk (not a tactical one). Find space by identifying a safe location for practice. Start small by beginning at 15-20 feet distance. Practice consistently by dedicating 30-45 minutes weekly. Track progress by keeping records of your improvements. Join community by finding a local range or throwing group. Have fun by remembering why you wanted to learn this in the first place.
Remember: every expert was once a beginner. Your first 50 throws will be rough. Your first 100 will show improvement. By 200 throws, you’ll be performing consistent sticks. At 500, you’ll be seriously skilled. Then by 1,000, you’ll be among the competent throwers.
The path to mastery is simple: start today, practice consistently, and enjoy every step of the journey. The ancient art of tomahawk throwing awaits, and you’re ready to master it.
FAQ: Common Questions About Tomahawk Throwing
Q: Can I throw a regular camping hatchet?
A: Not recommended. Camping hatchets are heavier and longer, making them difficult to control. Proper throwing tomahawks are specifically designed for this purpose.
Q: How far can you throw a tomahawk?
A: Beginners throw 15-25 feet accurately. Intermediate throwers reach 25-35 feet. Advanced throwers can reach 35-45+ feet. Distance depends on skill, tomahawk weight, and throwing power.
Q: Is tomahawk throwing an Olympic sport?
A: Not currently, though axe throwing has grown in popularity. Tomahawk throwing has national competitions through the IKTHOF but isn’t in the Olympic Games.
Q: What’s the easiest mistake beginners make?
A: Incorrect thumb placement on the grip. This alone can ruin your throw, despite perfect technique elsewhere.
Q: Can women throw tomahawks as effectively as men?
A: Absolutely. Tomahawk throwing isn’t strength-dependent. It’s technique-dependent. Lighter tomahawks and proper form allow anyone to excel.
Q: How much does a good throwing tomahawk cost?
A: Quality equipment costs $50-$100. You don’t need to spend more initially.
Q: Is there an age requirement?
A: Most ranges accept ages 12+, though some require 16+. Mature younger throwers with strong supervision can learn safely.
Q: Can you teach yourself, or do you need professional instruction?
A: Self-teaching is possible with good resources. Professional instruction accelerates progress and prevents bad habits from forming.
Q: What’s the difference between a tomahawk and a hatchet?
A: Historically, tomahawks are lighter and more balanced for throwing. Modern distinction is less clear, but tomahawks typically have thinner blades optimized for rotation.
Q: How long until I’m “good” at tomahawk throwing?
A: Expect 4-6 weeks to achieve consistent accuracy at beginner distances. Expect 2-3 months to throw competitively at intermediate level. True mastery takes years of dedicated practice.

Mark Foster loves to push his limits when it comes to survival in the wilderness. He might go for a 30-days adventure without any food or equipment except for a survival kit and a knife. We should mention that his survival kit has 122 items in it, so he know what he is doing. Mark is working on his book to share with the world all his experience gained during those brave adventures.
I read an interview with a pro Tomahawk thrower a few months ago and he was saying that a big mistake that people make is trying to ‘flick’ the knife as they let go of it to try and make it spin. Problem with that, he said, is that you cannot reproduce that same flick throw after throw. His tip was to start with your arm fully extended vertically and to snap your arm downwards until it is fully extended horizontally. The knife will then take care of itself, spinning-wise, and you should be able to replicate the technique repeatedly.
That seemed to be a wise technique. For that, you would need an excellent tool – choose whether you need a tactical or a throwing tomahawk and work from there. Throwing tomahawks are the ones suited for this competition and make sure you do consider what your requirements are.
I try to be at least passably adept at as many weapons as I can. I have thrown a tomahawk or two in the past but I’ve never had any idea of the techniques that might be suited to it. Thanks for the step by step guide on at least one widely used techniques. I’m excited to try again next time I have a chance.
Hi Jay and thanks for your comments. I’m pleased that the article has helped you a lot. I hope you get in touch again to update us on your progress. Goodluck with your throwing!
I am extremely excited about this. I’ve always wanted to be skilled with some kind of weaponry. I read somewhere it’s more important to learn about your arm and grip before you really start to figure out what kind of tomahawk or knives you prefer to throw, such as wood or metal, etc.
Lightweight tomahawks are best for beginners. As you grow more accustomed to them and gain more skills, you can try throwing the heavier ones. With your height and reach in mind, you can choose which tomahawks will suit you. This will help your stance and balance as you start throwing.