
The best backpacking lunch ideas balance calories, nutrition, weight, and ease of preparation. For short day trips, home-prepped meals like sandwiches, dehydrated chicken salad, and calorie-dense Logan bread are simplest. For longer trips, carry a lightweight stove for hot meals like mac and cheese or oatmeal. And when you need fuel on the move, homemade protein bars and no-bake oat bars deliver quick energy. Whatever you choose, keep perishables cool, handle cooked ingredients safely, and pack out all waste.
What’s the highlight of a backpacking trip for you? The challenge of a steep climb, or the satisfaction of reaching the summit? Either way, none of it happens without the energy from a good meal. Lunch can make or break your day on the trail, so it pays to plan it well. The best hiking lunches account for calories, nutritional balance, ingredient freshness, ease of preparation and eating, and total weight. Instant meals are convenient, but nothing beats good home cooking, and it doesn’t have to be complicated. Below are easy backpacking lunch ideas split into three approaches: home-prepped meals, on-site cooking, and power-up snacks.
Which Lunch Approach Is Right for You?
| Approach | Best for | Pros | Keep in mind |
|---|---|---|---|
| Home-prepped meals | Day trips, short overnighters | Light, fast, no cooking gear | Perishables need to stay cool |
| On-site cooking | Multi-day trips | Hot, high-calorie, morale boost | Carry a stove, fuel, and water |
| Power-up snacks | Fast-paced hikes | No prep or stops needed | Less filling than a full meal |
Home-Prepped Meals
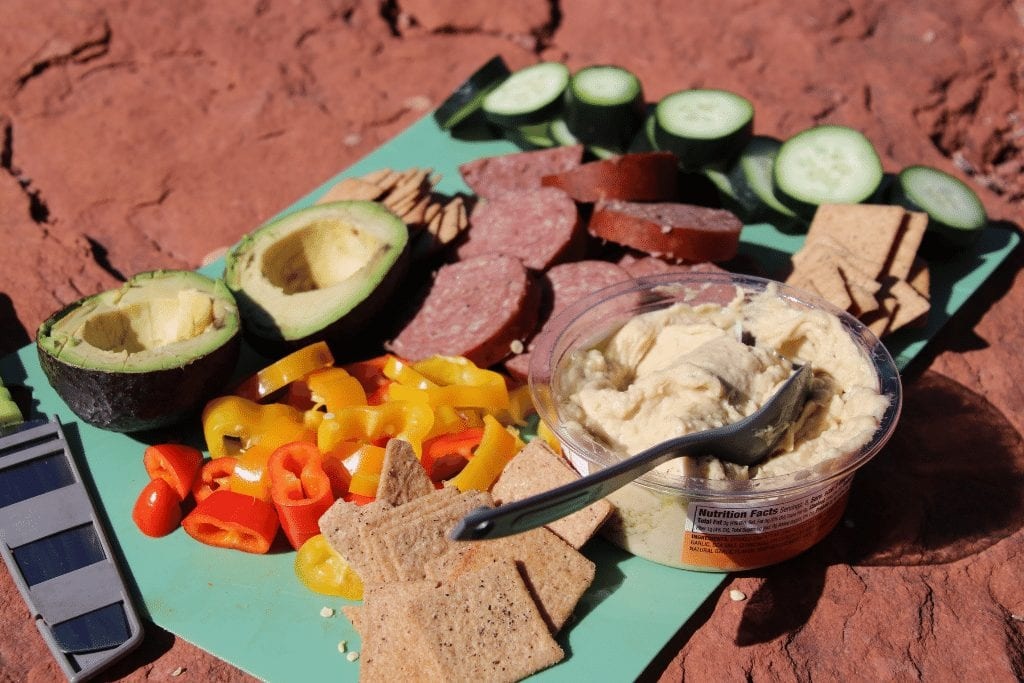
Wondering what to pack for a weekend hike? If it’s a short day trip with two or three people, skip the stove, fuel, and fresh ingredients and simply pre-prepare meals at home in sturdy lunch containers. When it’s time to eat, you just find a shady spot, open your reusable containers, enjoy, and pack out any waste so you leave no trace. It isn’t as fun as cooking on the mountain, but it’s simpler, quicker, and lighter, and these ideas take only 30 minutes to an hour with a normal kitchen.
Home-Prepped Meal 1: Sandwiches
The day-trip staple, sandwiches are easy to make, filling, and endlessly customizable, as long as you avoid ingredients that spoil quickly. Here’s a basic build you can riff on.
- Choose your bread and decide on your format. Flat sliced bread cuts neatly to fit a container with no wasted space, while bagels or tortilla wraps hold up far better on longer trips, since they’re sturdier and slower to go stale.
- Add condiments if you like a moist sandwich, such as mustard, a little mayonnaise, or butter. Skip them for a drier sandwich that travels well. If you use mayonnaise or other perishable spreads, keep the sandwich cool.
- Add your fillings, keeping it to a manageable height. Towering restaurant-style sandwiches topple and make a mess without a plate and cutlery, so keep yours flat and compact. Shelf-stable fillings like peanut butter and jelly, hard cheese, or cured meats travel better than deli meats and fresh produce, which need to stay cold.
Home-Prepped Meal 2: Dehydrated Chicken Salad
You can absolutely enjoy a chicken salad on the trail, and it’s lighter and longer-lasting than you’d expect. One important safety note first: always start with fully cooked chicken, since dehydrating raw meat at home isn’t safe. Cook it through, then dehydrate. A food dehydrator makes this easy.
- Cook your chicken completely, then chop it finely along with vegetables like carrots, bell peppers, onions, and cabbage. Lettuce tends to disappear once broken down, so it’s optional. Spread everything on a tray and dehydrate until fully dry.
- Prepare the dressing separately. Use a shelf-stable option if you can, or keep perishable dressing like mayonnaise cool, and pack it in its own zip-top bag. Don’t dress the salad in advance, since that speeds spoilage.
- Pack the dried chicken and vegetables in a container or zip-top bag, and add sesame seeds or fresh herbs for flavor if you like.
- To rehydrate, add water to the bag roughly one to two hours before eating, using about three-quarters of a cup per three ounces of salad, then seal it well and let it sit. In warm weather, keep the bag cool while it rehydrates and eat it promptly once it’s ready, since rehydrated cooked chicken shouldn’t sit warm for long. Using hot water speeds rehydration and is the safer choice on longer trips.
Home-Prepped Meal 3: Logan Bread
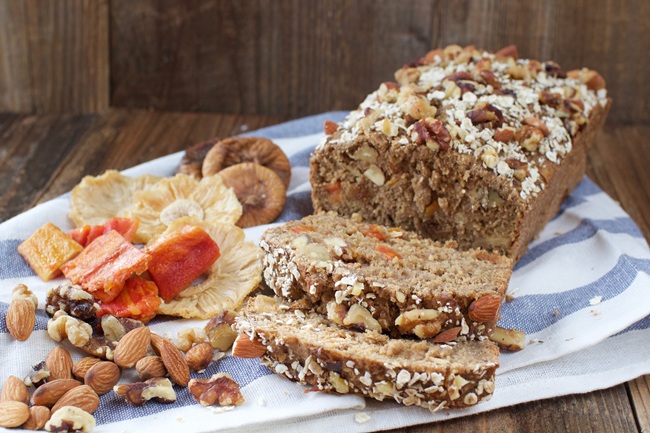
Most bread is filling, light, and long-lasting but not calorie-dense enough for hard climbing. Logan bread fixes that by packing in dried fruit, seeds, and nuts for serious energy. It takes a little longer to make, with 90 minutes of baking, but it’s worth it.
- Preheat the oven to 275°F.
- In one bowl, mix 3 cups of flour, 1 cup of oats, 1 cup of wheat germ, half a cup of powdered milk, 1.5 teaspoons of baking powder, and about 2 teaspoons of salt. (This is a baking-powder quick bread, so it needs no yeast.)
- In a second bowl, combine 4 eggs, 1 cup of vegetable oil, half a cup each of molasses and honey, half a cup of water, and half a cup of brown sugar, plus half a cup each of dried cranberries, dried cherries, and chopped walnuts.
- Combine both bowls and mix well.
- Grease two 9×9-inch pans (or one large pan) with butter, then spread the batter evenly.
- Bake about 90 minutes, testing with a toothpick in the center. If it comes out clean, it’s done.
- Cool completely, then cut into trail-sized pieces.
On-Site Cooking
Cooking on the trail suits longer trips, since home-prepped meals won’t last a week and juggling dozens of labeled zip-top bags gets old fast. With a versatile, portable backpacking stove and a few pouches of instant food, you can have a hot, high-calorie meal almost anywhere. If your route has a reliable water source, even unclean, you can treat the water before use, which keeps both your energy and morale high. For help choosing a stove, see our guides on how to pick a camping stove and the best camping stoves, and for treating water read does boiling water purify it.
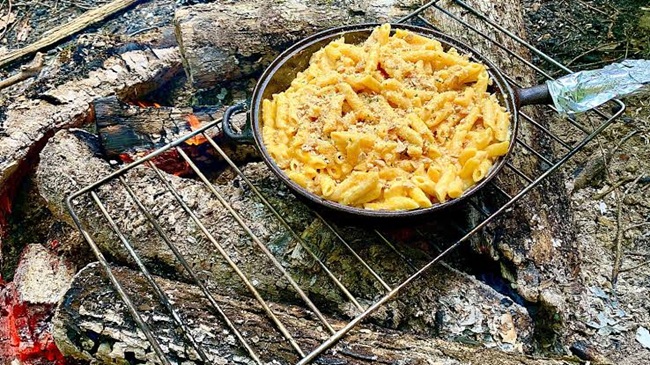
On-Site Cooking 1: Mac and Cheese
Everyone’s favorite comfort food is loaded with calories, easy to make, and tastes twice as good on a mountain.
- Boil two cups of water on your stove, add the macaroni, and cook about five minutes, stirring now and then, until tender. Let it cool slightly.
- Stir in powdered milk and powdered cheese.
- Add texture and protein with smoked beef, tuna, or bonito flakes.
- Season with salt and pepper, and grate over a little Parmesan if you brought some.
On-Site Cooking 2: Oatmeal
Oatmeal isn’t just for breakfast, since it makes a quick, filling, endlessly customizable lunch too, and a single pack can cover days of meals.
- Boil one and a half cups of water, then reduce to a simmer.
- Stir in oats along with your favorite dried fruit and a little powdered milk, and simmer about four minutes until it reaches the consistency you like. Let it cool.
- A pinch of cinnamon really lifts the flavor.
On-Site Cooking 3: Trail Donuts
You can even fry donuts on the trail if you’re willing to carry a little oil. It’s not the lightest option, but in a group you can split the load, with one person carrying flour, another sugar, and another the milk.
- Mix 1 cup of flour with 1 tablespoon of baking powder, plus salt and sugar to taste. Stir in butter and milk until you have a workable dough.
- Knead it briefly, with no need for a long rest.
- Heat oil in a pot on your stove.
- Fry the dough until golden brown. Let the oil cool, then store it in a sealed container to reuse, and always pack out used oil rather than dumping it.
- While the donuts are still warm, coat them in confectioner’s sugar and cinnamon.
Aside from the donuts, you can use the same boil-and-season method to make other instant meals like chili, soup, and couscous.
Power-Up Snacks
Some hikers want a full lunch, while others keep moving on an energy bar or two. On fast, intense trips, these high-energy homemade snacks keep you fueled without a prep or meal stop. Store-bought energy bars work, but backpacker-specific ones get pricey, so making your own is cheaper and just as tasty.
Power-Up Snack 1: Coffee Milk Protein Bars
These sweet, crunchy energy bombs take about an hour and can be made well ahead and stored in a jar or bag. The recipe makes a large batch.
- Preheat the oven to 325°F.
- Beat 3 eggs in a bowl until fluffy.
- Add half a cup of melted butter, 2 teaspoons of vanilla, and 1 to 1.5 cups of sugar to taste.
- Mix in 1 teaspoon of salt and 2 cups of flour.
- For the flavoring, combine equal parts powdered milk and coffee crystals, about a quarter to half a cup of each.
- Stir the coffee mixture through all the batter, or through only half if you want to create layers.
- Fold in pecans and chocolate chips if you like.
- Grease the pan and bake about 30 minutes.
Power-Up Snack 2: No-Bake Protein Bars
No oven? This one couldn’t be simpler, needing just honey, peanut butter, and instant oats.
- Over low heat, warm 1 cup of honey in a saucepan, then stir in an equal amount of peanut butter.
- Keep stirring until smooth and evenly combined.
- Before it cools, stir in 2 to 3 cups of oats, plus any seeds, nuts, or dried fruit you like. Press into a pan or shape into bars and let set.
A Quick Word on Trail Food Safety
Keep perishable foods like deli meats, cheese, and mayonnaise-based dishes cool, and eat them earlier in the trip. Always start with fully cooked meat before dehydrating, and avoid letting cooked or rehydrated food sit in the warm “danger zone” for hours. When in doubt, lean on shelf-stable ingredients, and pack out every scrap of waste, including used cooking oil, to protect the places you love. For more inspiration, see our camping dessert recipes and vegan backpacking food ideas.
Frequently Asked Questions
What should I pack for lunch while backpacking?
For day trips, pack light no-cook meals like sandwiches, wraps, dehydrated salad, or calorie-dense Logan bread. For longer trips, carry a stove for hot meals like mac and cheese or oatmeal. Add homemade protein bars for quick energy on the move. Prioritize calories, low weight, and easy prep.
What is the best no-cook backpacking lunch?
Sandwiches and wraps are the best no-cook options for short trips, while dehydrated meals and Logan bread work better on longer ones. Tortillas, bagels, peanut butter, hard cheese, cured meats, and dried fruit all travel well without refrigeration and deliver the calories you need on the trail.
How do you keep backpacking food from spoiling?
Favor shelf-stable ingredients, keep any perishables cool and eat them early in the trip, and store dressings separately until mealtime. Dehydrated and dried foods last longest. Always cook meat fully before dehydrating, and don’t let cooked food sit warm for hours, since that’s when bacteria multiply fastest.
What is Logan bread?
Logan bread is a dense, calorie-rich quick bread made with dried fruit, nuts, seeds, oats, molasses, and honey. It’s designed to fuel long days of physical effort and keeps well for days, which makes it a classic backpacking and mountaineering trail food. It uses baking powder rather than yeast, so it’s simple to make.
How many calories should a backpacking lunch have?
Most backpackers aim for roughly 500 to 800 calories at lunch, and more on strenuous days, as part of a daily target often between 2,500 and 4,500 calories. Calorie-dense foods like nuts, nut butters, cheese, dried fruit, and Logan bread help you hit those numbers without heavy packs.
Can you cook real meals while backpacking?
Yes. With a lightweight backpacking stove, a pot, and a water source you can treat, you can make hot meals like mac and cheese, oatmeal, chili, couscous, and even fried donuts. On-site cooking adds weight from the stove and fuel, but it’s a big morale boost on multi-day trips.
Wrap Up
The lunch you eat after a hard morning on the trail matters more than you might think. Any food tastes good surrounded by nature, but your trail meals should also be nutritious, light, easy to prepare, and quick to give you an energy boost so you can keep moving. Every recipe here checks those boxes, and being far from home doesn’t mean giving up delicious, homemade food. Which approach appeals most, home-prepped, on-site cooking, or grab-and-go snacks? Share your own trail recipes in the comments below.


