

The best camping dessert recipes go far beyond s’mores. Below are seven easy campfire desserts, from a 10-minute banana boat to a Dutch oven pineapple cake. Some are simple enough for kids at a car campsite, and some are minimal enough for a backpacking trip. If you thought campfire desserts started and ended with s’mores, it’s time to try something new. I tested dozens of recipes, and these seven are the ones worth making again.
Editors Note: We get commissions for purchases made through links in this article., article was updated May 2026.
Useful Camping Tools for Desserts
Each recipe lists its own gear. But these are the items I reach for again and again when I make desserts outdoors:
- Grill rack
- Portable stove (here are more camp stove recipes to try once you’re set up)
- Matches, or a good lighter (see our guide on choosing the best survival lighter if you want something more reliable than a match)
- Heavy-duty foil
- Can opener
- Food storage containers
- Cleaning sponge
- Biodegradable soap
- Quick-dry towel
- Cooler for car camping
- Odor-proof bags, so you don’t attract wild animals to your campsite
One more thing to keep in mind. If there is a fire ban where you camp, most of these desserts still work on a propane stove or portable grill. Always check local fire rules before your trip. Now let’s get into the desserts.
#1: Apple Crisp Dessert
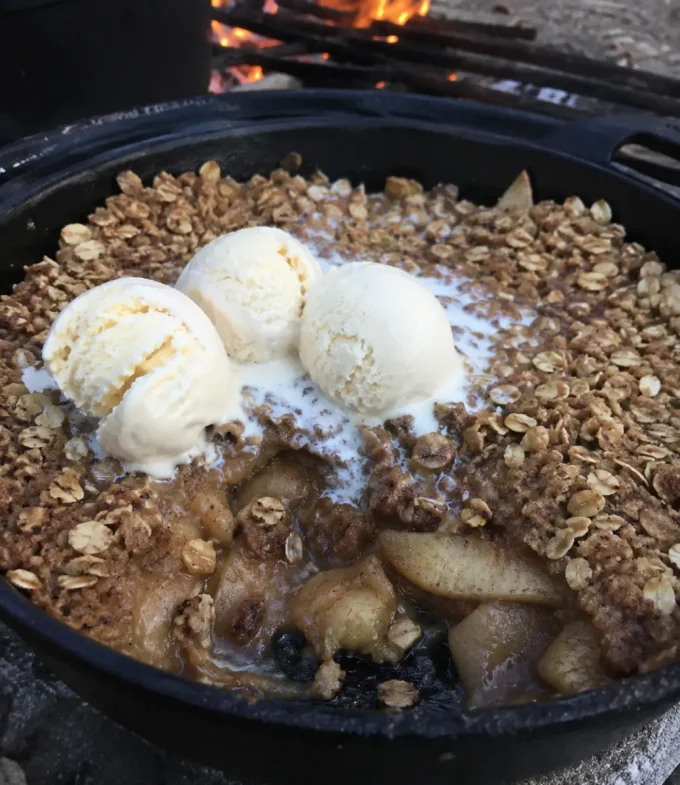
Apple crisp is one of my favorite camping desserts for cooler trips. It is simple, warm, and smells amazing over a campfire. It also tastes homemade, even though it takes no real baking skill. This recipe takes about 15 minutes to prep and about 35 minutes to cook. Quick tip: Toss the sliced apples with a little lemon juice. This slows down browning while you prep the rest. Equipment needed:
- Cutting board
- Sharp knife
- Wooden spatula
- Measuring cups
- Measuring spoons
- 10-inch cast iron skillet
Ingredients:
- 4 medium apples, peeled and cut into ¼-inch slices
- ¾ cup brown sugar
- 2 tablespoons bourbon
- ½ teaspoon cloves
- 1 teaspoon cinnamon
- ½ tablespoon nutmeg
- 1 tablespoon oil or unsalted butter
- 1 cup granola
- Vanilla ice cream, for topping
How to make it: Heat the cast iron skillet over hot campfire coals. Toss the apple slices in a little butter and cook them in the skillet until soft. Add the brown sugar, cinnamon, nutmeg, cloves, and bourbon, and keep stirring. Cook for another 5 to 10 minutes, until the sauce thickens. Take it off the heat. Sprinkle the granola on top and serve with a big scoop of vanilla ice cream. Tip: Make this on your first night of camping, since ice cream will not last long in a cooler. You can swap a few things to make it vegan, but kids will happily eat it just as it is.
#2: Plum Tart Dessert
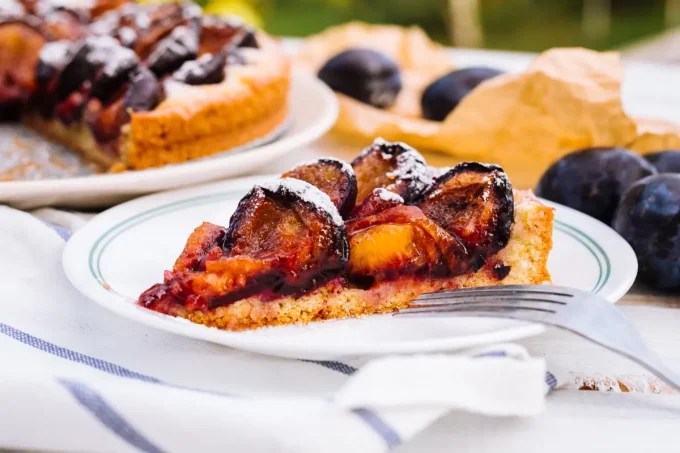
This dessert is best for car camping or glamping, where you have extra space and a cooler. I would not pick it for minimalist backpacking, since it takes more work than the others here. But if you enjoy campfire baking, it is worth the effort. Equipment needed:
- Chopping board
- Sharp knife
- Cast iron skillet
Ingredients:
- ½ cup cold water
- 1 cup fine flour
- 4 tablespoons butter
- 5 to 6 ripe plums
- ½ teaspoon salt
- 2 tablespoons sugar
- 2 tablespoons honey
How to make it: Make the pastry at home before your trip. Mix the flour and salt in a large bowl. Grate the butter, add it in, and rub it through until the mix looks like breadcrumbs. Add a little water and stir gently to bind the dough. Wrap it and chill for 15 minutes. Roll the pastry out between two sheets of baking paper, about 3mm thick, so it will cover the bottom and sides of your skillet.
Roll the pastry sheets back up and keep them in the fridge until it is time to camp. At the campsite: Slice the plums into a saucepan with water and sugar. Set the pan over hot coals, bring it to a boil, and simmer while you stir gently. Cook for about 10 minutes, until the plums are soft. Take the pan off the heat and strain the liquid into a separate pan.
Spread your pastry into the skillet, drizzle it with honey, and cover it with foil. Cook over low heat until the edges turn light brown. Take it off the heat and serve.
#3: 10” Pineapple Upside-Down Cake
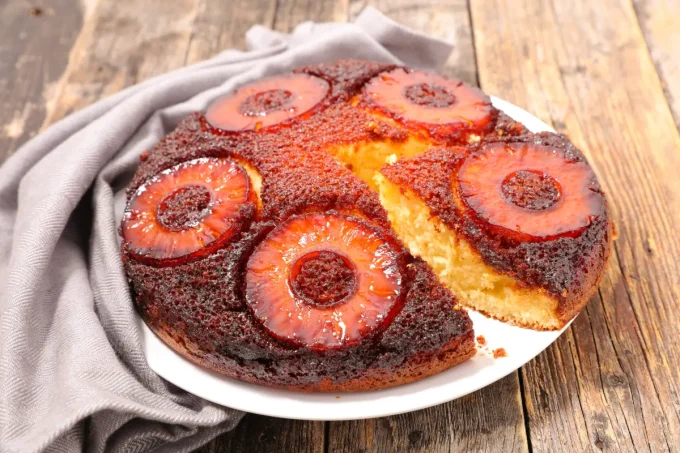
If you like Dutch oven cooking while camping, this dessert is hard to skip. The pineapple caramelizes beautifully over the heat, and the result looks far more impressive than the work it takes. This one makes the most sense for car camping, because of the gear involved. It takes 40 to 50 minutes to bake. Equipment needed:
- 10-inch Dutch oven
- Dutch oven carry bag
- Lid lifter
- Dutch oven lid stand
- Charcoal chimney starter
- Heat-resistant gloves
- Heavy-duty tongs, for placing coals
Ingredients:
- 1 cup all-purpose flour
- ½ cup butter
- 2 whole eggs
- 2 cups brown sugar
- 2 teaspoons baking powder
- ½ cup milk
- 1 teaspoon vanilla extract (or another extract you like)
- Water
- 1 can pineapple rings
- Vegetable oil
How to make it: For the topping: Line the Dutch oven twice with extra-sturdy aluminum foil. Set the oven on the campfire, melt the butter inside, then stir in the brown sugar until it is smooth and thick. Lay the pineapple rings in the mixture, and set the leftover pineapple juice aside.
For the batter: In a separate pan, soften the butter and slowly add the sugar until it turns lighter and grows in volume. Add the reserved pineapple juice, water (use the empty pineapple can to measure), and eggs, then beat it well. Stir in the vanilla extract. In a large bowl, mix the flour, baking powder, butter, and water, and beat until smooth.
Pour the batter over the pineapple rings in the Dutch oven until they are fully covered. Put the lid on the Dutch oven and place 10 to 13 briquettes on top. Briquettes give you more control over the heat than loose coals. Bake for about 30 minutes, until golden brown. Check it with a toothpick, which should come out clean. Take the oven off the heat, place a pan or lid over the top, and flip the cake in one motion. Gently peel away the foil, and your upside-down pineapple cake is ready.
#4: Banana Boat Dessert
This rich, banana-based dessert takes just 8 to 10 minutes over a campfire. That makes it perfect when you do not want to spend much time on dessert. It is also a great one to let kids help with. Equipment needed:
- Heavy-duty aluminum foil
- A knife
Ingredients:
- Ripe bananas (one per person)
- Chocolate chips, Hershey’s chocolate, peanut butter chips, or another sweet filling you like
- Marshmallows
How to make it: Cut a slit down the middle of each banana peel, about ½ inch wide, and leave the ends closed so it looks like a canoe. Open the slit and scoop out about half the banana. Stuff the bananas with chocolate chips and marshmallows, then wrap them in foil. Place them over hot coals and roast, turning often, for about 10 minutes. Take them off, peel gently, and enjoy.
#5: Campfire Roasted Caramel Peaches Dessert
As the name says, this dessert cooks right over the campfire. It is a great one to make with kids and takes about 25 minutes from start to finish. Peaches are one of many fruits in season that make a great campfire dessert, and this caramel version is easy and truly tasty. Equipment needed:
- Aluminum foil
- Grill rack
- Campfire
Ingredients (for two peaches):
- 2 peaches
- ¼ cup pecan halves
- 1 teaspoon butter
- 2 tablespoons caramel sauce, or 1 tablespoon brown sugar
How to make it: Let your campfire die down to low heat. Butter a six-inch piece of foil and drizzle it with the caramel sauce or brown sugar. Scatter the pecans over the top. Slice the peaches in half and remove the pits. Place the peach halves cut-side down on the pecans, then drizzle with any leftover caramel sauce.
Wrap the peaches tightly in the foil and set them over low heat or burned-down coals. Let them cook slowly for 25 minutes. Take them off the heat and unwrap them right away to let the steam escape for about five minutes. Turn the dessert upside down onto a plate and serve it warm.
#6: Delicious Peanut Butter No Bake Cookies Dessert
These chewy little treats are a summer favorite for many families. But they can turn into a sticky mess, or come out dry and sandy, if you rush. Following the steps closely is what makes the difference between soft, creamy cookies and crumbly ones.
Equipment needed:
- Baking sheet or saucepan
- A pot
- Medium cookie scoop
- A spatula
- Wax paper
- Airtight container
Ingredients (makes 16 to 20 cookies):
- ¼ cup cocoa powder
- 3 cups quick-cooking oats (gluten-free if needed)
- ½ cup peanut butter, smooth or crunchy
- 2 cups sugar
- ½ cup milk
- ½ cup butter
- Pinch of salt
- 2 teaspoons vanilla extract
How to make it: Line a baking sheet with wax paper and set it aside. In a saucepan over the campfire, mix the cocoa powder, sugar, butter, milk, and salt, and stir the whole time to dissolve the sugar. Bring it to a boil and keep boiling for about two minutes. Take it off the heat and stir in the peanut butter, vanilla, and oats until the oats are fully coated.
Once it is mixed, take the pan off the heat completely. Use a medium cookie scoop to drop the dough onto the baking sheet. Press the cookies flat with a spoon, or roll them gently between your palms into small balls. Let the cookies cool and firm up for about 20 minutes. Store any extras in an airtight container. Optional: Drizzle with caramel sauce, or any topping you like, to dress them up.
#7: Campfire Orange Cake Dessert
This is the camping version of a cupcake. It has a rich orange flavor that ends up tasting a bit like a chocolate-orange treat. It takes about 50 minutes from prep to finish, and the batter makes 10 to 12 single-serving cakes. Equipment needed:
- Sharp knife
- Grapefruit knife
- A spoon
- A fork
- A sifter
- Large and small mixing bowls
- A whisk
- Heavy-duty aluminum foil
- A pair of tongs
Ingredients:
- 10 to 12 large navel oranges
- 1 cup very hot water
- 1¾ cups all-purpose flour
- ½ cup vegetable oil
- 2 teaspoons vanilla extract
- 2 eggs
- 1 cup milk
- 1 teaspoon salt
- 1½ teaspoons baking soda
- ¾ cup unsweetened cocoa powder
- 1½ teaspoons baking powder
- 2 cups white sugar
How to make it: Hollow out the oranges: Clean the oranges well. With a sharp knife, cut off the top quarter (about 1 to 2 inches) of each orange. With a grapefruit knife, cut the flesh away from the inside of the peel, staying as close to the skin as you can, then scoop it out with a spoon until each orange is empty. Do this for all your oranges, and keep the scooped fruit in an airtight container to eat later or juice.
Make the batter: In a large bowl, whisk the flour, sugar, baking powder, baking soda, cocoa powder, and salt until there are no lumps. In a small bowl, whisk the eggs with the vanilla, milk, and oil, then mix that into the dry ingredients. Add the hot water and beat it well. The batter should be thin. Rake the hot coals of your campfire into a flat bed and let the fire die down a bit.
Fill each orange three-quarters full with batter, put the cap back on top, and wrap each orange tightly in foil. Make sure the cap stays upright. With tongs, place the wrapped oranges on the hot embers, spaced a few centimeters apart, and cook for 15 to 20 minutes. Take them off the coals with the tongs and let the oranges cool for about 10 minutes before you unwrap them.
Grab a fork and dig in. Nobody wants insects swarming the dessert table, so you may also want to check out my homemade insect repellent recipe for full protection on your next trip.
Frequently Asked Questions
What are the easiest camping desserts to make?
Banana boats and roasted caramel peaches are the easiest here. Both cook over the coals in foil in about 10 to 25 minutes, and kids can help make them.
What camping desserts work for backpacking?
Stick to simple, low-gear recipes like banana boats or peanut butter no-bake cookies. Skip the plum tart and Dutch oven cake, since they need more space and heavy equipment.
Can I make camping desserts without a campfire?
Yes. If there is a fire ban, most of these recipes work on a propane stove or portable grill. Always check local fire rules before your trip.
What dessert can I make in a Dutch oven while camping?
The pineapple upside-down cake is a classic Dutch oven camping dessert. Use 10 to 13 charcoal briquettes on the lid for even heat, and bake for about 30 minutes.
Which Recipe Will You Make First?
If you thought campfire desserts stopped at s’mores, I hope this list changed your mind. When you are out in the woods for a few days, you will have plenty of time to try them all and make your trip more fun. If some feel a bit ambitious, the campfire orange cake is a fun, easy place to start. And if you want something almost effortless, you can’t go wrong with melted banana boats over the coals. Which one are you trying first? Let us know in the comments below.

Daniel is a gear freak when it comes to hiking, climbing and camping. He went to REI Outdoor School to meet new people and learn best practices. Don’t even try to argue with him about the latest backpack or ice axe, he tried most of them. Daniel’s dream is to climb Mount Everest.