
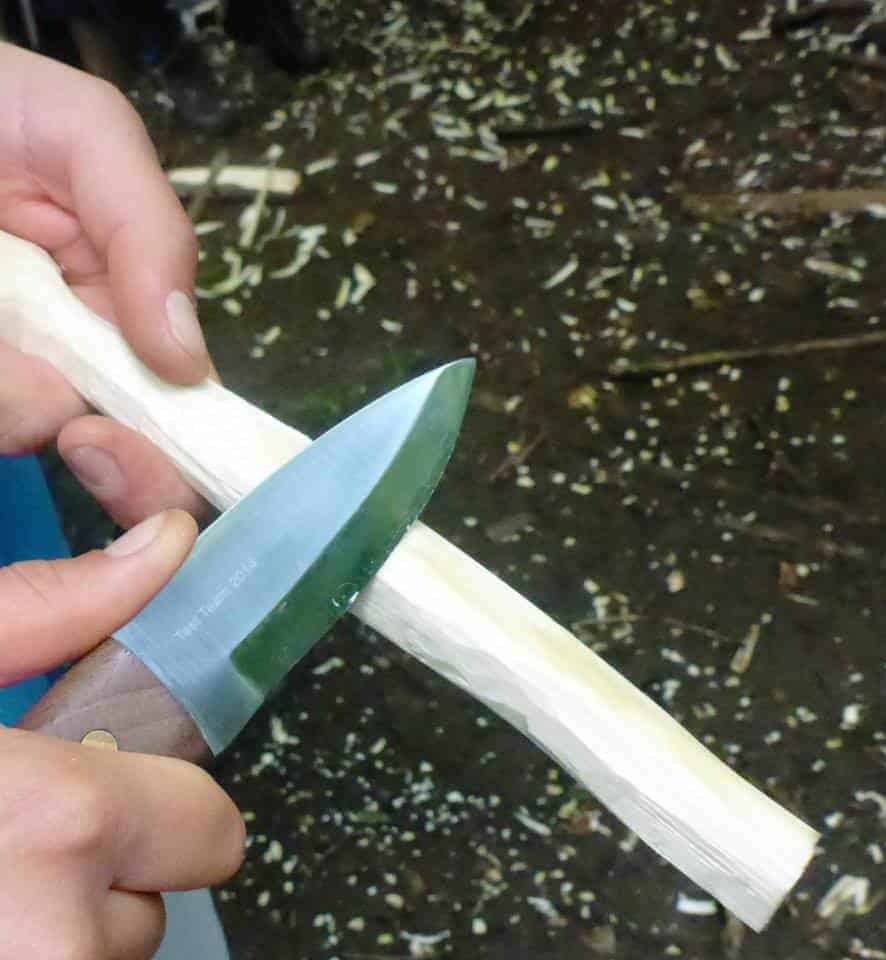
Knowing how to sharpen a knife in the wild is a skill that can quietly save your trip, and sometimes your life. A dull blade in the backcountry is almost as useless as no blade at all. It slips, it tears instead of cuts, and it forces you to push harder, which is exactly how most knife accidents happen.
The good news is that you do not need a store-bought whetstone or a fancy kit. The single best field method is also one of the oldest, and that is sharpening your blade on a natural stone. There are plenty of suitable stones scattered across most wild landscapes, so you simply need to know what to look for and how to use it. It takes a little practice to master, but once you feel the rhythm, you will never panic over a dull edge again.
This guide covers everything, including how to choose the right stone, prep it, use the sharpening motion, test your edge, and adapt the technique for different knives. Let’s get into it.
Why a Sharp Knife Matters So Much Outdoors
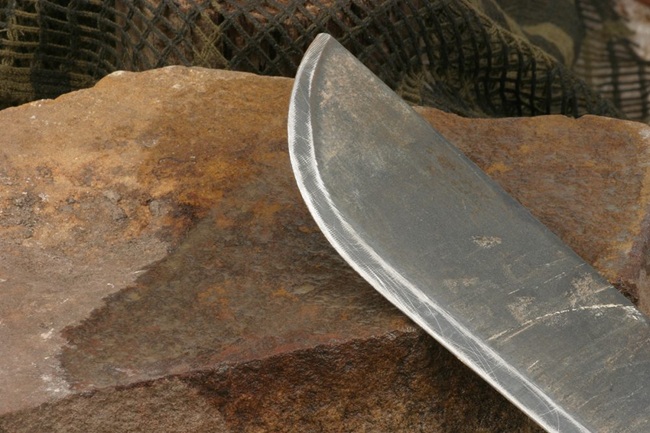
A sharp knife is one of the most important tools you can carry into the wild. You will use it for processing firewood, building shelter, preparing food, dressing game, cutting cordage, and handling dozens of small problems you cannot predict in advance.
Here is the part most people get backward. A sharp knife is actually a safe knife. A keen edge bites where you place it and cuts with control. A dull edge skates across the surface, demands extra force, and then lurches toward your fingers when it finally catches. So keeping your blade in top shape is not just about performance. It is about staying in one piece when help is hours or days away.
How to Sharpen a Knife in the Wild Using a Stone
The core method is simple. You slide the blade across a flat stone at a steady angle, working both sides evenly until you raise a fine edge. Before you start, though, you need to find the right stone, because the wrong rock can ruin your blade.
Finding the Right Sharpening Stone
Not every rock you find will sharpen a knife. Some will do nothing at all. Others will actively chew up your edge and leave it duller than when you started. So the first job is learning to recognize a good natural sharpening stone.
What you want is a stone with a flat, smooth, fine-grained surface. It needs to be fine enough to abrade steel gradually rather than gouge it. The same principles apply to fixed blades and folders alike, so this technique works whether you carry a full-tang bushcraft knife or a pocket knife.
The best candidates are usually sedimentary or fine-grained rocks. You will most often find them near streams, rivers, and lakes, at the base of mountains, and in scree fields.
Stones That Work
Three common stone types make excellent field sharpeners:
- Limestone. Usually grey, but it can also be white, yellow, or brown. It scratches easily and fizzes on contact with a mild acid like vinegar. Because it breaks when struck hard, you should handle it gently.
- Siltstone. This comes in a wide range of colors depending on its mineral content. Scraping the surface dislodges tiny silt grains or leaves a faint, powdery residue. Its fine grit makes it a great natural sharpener.
- Slate. Mostly shades of grey, though it can run red, black, purple, or brown. Slate naturally splits into flat sheets, so it gives you an ideal level surface with almost no effort.
If you spot a flat slab of any of these near water, you have likely found your sharpening stone.
Stones to Avoid
Most rocks you should skip have a rough, jagged, or glassy look. Watch out for these three in particular:
- Rhyolite. Dark, very hard, and glassy. It is too hard and uneven to give a clean edge.
- Pumice. Lightweight with a spongy texture full of holes. It crumbles and will not hold a flat surface.
- Sandstone. This is the sneaky one. It can look smooth, yet its surface is studded with sand grains that you can often see and feel. As a result, sandstone is far too coarse and will scratch your edge.
Here is a quick rule. If a stone has sharp edges, an irregular surface, or visible grit, leave it. Always run your fingers across a stone before you trust it. A good sharpening stone feels flat and smooth, almost like worn river rock. If it feels gritty or bumpy, keep looking, and do not rush the decision.
Prepping Your Stone
Once you have found a good stone, a little prep makes a big difference. First, apply some water or oil to the surface before you start. This creates a slurry that carries away metal filings, reduces heat from friction, and helps the blade glide instead of grabbing.
For the common stones you will find in the wild, water works better than oil. A splash from the same stream where you found the rock is perfect. Re-wet the surface whenever it dries out during sharpening.
The Sharpening Procedure, Step by Step
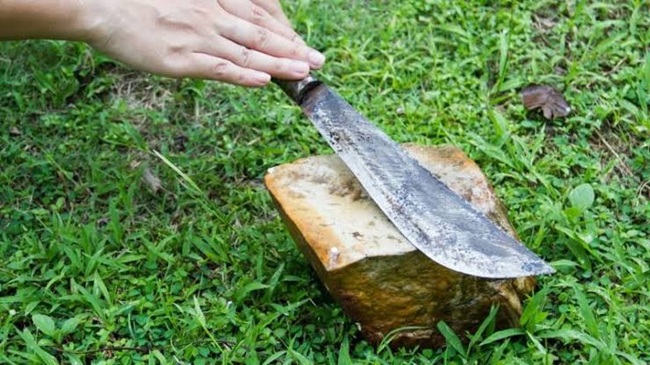
The reason you want a flat stone is simple. You slide the blade across the stone, not the stone across the blade. Grinding a loose rock along your edge, the way many people instinctively do it, usually makes the knife duller rather than sharper.
Here is the proper method.
Step 1: Secure Your Stone
First, get the stone into a stable position so it will not shift while you work.
- For a large stone, set it on a flat surface such as a log, a boulder, or the ground, then brace it so it stays put. You will move the knife to the stone.
- For a small stone, hold it firmly in one hand with the surface angled toward the blade, and keep your fingers clear of the edge’s path.
After that, wet the surface as described above.
Step 2: Find Your Angle and Rhythm
The angle between your blade and the stone determines how sharp the final edge will be. Aim for a minimum of 20 degrees, and slightly more for thicker, heavier blades. Holding that angle consistently on every stroke is the whole game.
Work through the motion like this:
- Place the heel of the blade, the part nearest the handle, at the bottom end of the stone at roughly a 20-degree angle.
- Slide the blade forward and across in a smooth, sweeping arc, moving in the direction the edge points, as though you were trying to shave a thin layer off the stone. Travel the full length so the entire edge, from heel to tip, makes contact.
- Flip the knife and repeat on the other side using the same angle and the same motion. Both sides of the edge need equal attention.
- Keep going for about 5 to 10 minutes for a solid working edge, alternating sides as you go.
Maintaining the same angle and tempo on every stroke is harder than it sounds, because most people unconsciously change the angle as they tire. Stay focused, and slow down if your strokes start to drift.
Tips for a Consistent, Even Edge
These small habits make a big difference to the final result:
- Rest your free fingers lightly on the flat of the blade as you stroke. This steadies the angle, and it is easier to do on a larger stone.
- Count your strokes. A reliable pattern is 10 strokes on one side, then 10 on the other, repeated until you raise an edge. Equal counts give you an even, symmetrical result.
- Lock your wrists. Movement should come from your shoulder and elbow, not your wrist. A flexing wrist constantly changes the angle and ruins the edge.
- Cover the whole blade. Make sure the tip gets as much work as the heel. Since most blades curve toward the point, lift the handle slightly as you reach the tip.
- Mind the angle trade-off. A lower angle gives a sharper but more fragile edge, while 20 degrees is a durable balance for a hard-working field knife.
How to Tell When Your Knife Is Sharp
You do not need fancy testing gear. Instead, the trick is to feel for the burr, which is a thin, almost invisible wire of metal that forms along the edge once you have ground away enough steel.
First, lightly drag your fingertip across the edge, never along it, on each side. When a burr has formed, that side will feel slightly rough and grabby, and it will catch on your skin more than the smooth side. Once you feel a consistent burr along the whole length of one side, switch to the other.
After both sides have a burr, a few light alternating finishing strokes will knock it off and leave a clean, sharp edge. If both sides still feel perfectly smooth, then you have not reached the burr yet, so keep working. As a final test, a properly sharp blade should shave hair off your arm or slice cleanly through paper or cordage.
Sharpening Different Types of Knives
Not every knife responds the same way to stone sharpening. Bigger, harder blades need more patience and a different touch than small, soft ones. Here is how to adapt for the three most common camp knives.
How to Sharpen a Tactical Knife in the Wild
Most people heading into the backcountry carry some kind of tactical or survival knife, so it pays to know how to bring one back from dull using nothing but a rock.
Tactical knives are arguably the hardest to sharpen by hand. Their blades are typically thick and made from harder, wear-resistant steels. That hardness holds an edge longer in use, but it also means each session takes more time. Therefore you should go slow, keep your angle dead consistent, and accept that it will take longer to raise a burr.
Hunting Knives
If you are not carrying a tactical knife, then odds are you have a hunting knife. The most common style is the clip point, where the spine curves down to the tip as if a slice had been clipped away.
Hunting knives are generally easier to sharpen than tactical knives, because their steel is usually a bit softer and responds well to an improvised stone. They also come in a wide range of sizes, and larger hunting knives dull faster, so give them extra time. As always, hold a minimum 20-degree angle and watch your consistency.
Utility Knives
Utility knives are usually the smallest blade you will carry. People mainly use them for fine work such as gutting, skinning, and trimming plants.
Because they are small and used less often, utility knives stay sharp for a long time. When they do need attention, though, they are the easiest to sharpen. The trade-off is that their thinner, softer steel wears away quickly on stone, so go light. Too much pressure can deform the blade and ruin it, so a gentle hand and a few careful passes are all they need.
Other Field-Expedient Sharpening Surfaces
If you cannot find a good stone, a few improvised options can still put a working edge back on your blade:
- The unglazed rim on the bottom of a ceramic mug or bowl. The rough ceramic ring acts like a fine sharpening rod.
- A leather belt or boot. This will not sharpen a truly dull blade, but stropping on leather realigns and polishes an edge that is only slightly off.
- The edge of a car window. The exposed top edge of tempered automotive glass can serve as a coarse, last-resort sharpener.
- Another knife’s spine. Gently steeling one blade against the unsharpened spine of another can refresh a rolled edge.
These are stopgaps rather than replacements for a proper stone, but they are worth knowing when you have no other options.
How to Keep Your Knife Sharp Longer
The best sharpening is the sharpening you never have to do. A few habits keep your edge keen for far longer:
- Sheath it when you are done. The number one cause of a dull blade is not heavy use. Instead, it is a knife left rattling loose in a pack or tossed on the ground where the edge bangs against grit. So holster it after every job.
- Never use your knife on the wrong materials. Avoid hacking hard wood, prying, digging, or stabbing it into trees to store it. Use a saw or hatchet for wood work, and save the knife for cutting.
- Improvise a sheath if you lose yours. You can make one in the field from bark, wood, or folded cordage rather than going unprotected.
- Touch up early and lightly. A quick few strokes when the edge first starts to drag is far easier than a full re-sharpen later.
- Use an angle guide. A simple wooden wedge cut to at least 20 degrees gives you a consistent reference, so every stroke matches the last.
Frequently Asked Questions
What kind of rock sharpens a knife best in the wild? Fine-grained, flat-surfaced sedimentary stones work best, especially limestone, siltstone, and slate. Look for them near streams, rivers, and lakes. Avoid rough, glassy, or gritty stones such as sandstone, pumice, and rhyolite.
What angle should I use to sharpen a knife on a stone? Aim for a minimum of about 20 degrees per side. Heavier blades can take a slightly steeper angle for durability, while a lower angle gives a sharper but more fragile edge.
Should I use water or oil on a wild sharpening stone? Use water. The common natural stones you find outdoors perform best with water, which lifts away metal particles and reduces friction.
How long does it take to sharpen a knife on a stone? It usually takes around 5 to 10 minutes for a solid working edge, depending on how dull the blade is and how hard the steel is.
How do I know when my knife is sharp enough? Feel for a burr, which is a thin wire of metal along the edge that catches on your fingertip when you drag it across, not along, the edge. Once both sides have a burr and you have knocked it off with a few finishing strokes, you have a clean edge.
Wrap Up
Sharpening a knife with nothing but a stone is not hard once you know the right way to do it. In fact, it might be one of the simplest and most valuable backcountry skills you ever pick up. First, choose a flat, smooth, fine-grained stone. Next, wet it down, hold a steady 20-degree angle, and work both sides evenly until you raise a burr.
Remember the small details too. Lock your wrists, keep your angle consistent, cover the whole blade, and go gentler on softer steels. Master that, and a dull knife will never slow you down in the wild again. Improvise, adapt, and overcome.

Daniel is a gear freak when it comes to hiking, climbing and camping. He went to REI Outdoor School to meet new people and learn best practices. Don’t even try to argue with him about the latest backpack or ice axe, he tried most of them. Daniel’s dream is to climb Mount Everest.
I am wondering about the quantity of passes taken with the blade against stone, versus the quality. Would you say that it is better to take many lighter passes, or few more forcefully pressed ones? I have found information supporting both sides from various sources and I am curious to get another vote, so that I know which way is wiser.
I think for most people including myself who sharpen their knives on a regular basis, one of the difficulties is not whether you make light or hard passes – it’s getting the right angle. From experience, I found that the shorter angle I use, the sharper my knife will be.
I’ve heard that any smooth stone can really do the trick when knife sharpening. I’ve never gotten into it but after reading this article it makes me really want to give it a go. How would you sharpen a knife if you weren’t able to find a stone?
Extremely interesting. This seems like something cool I would want to teach my son. I guess this means I will actually have to start liking camping and hiking. This was a great article, it really caught my attention. I guess I have never really though about this. I just assumed you could take a Swiss army knife and be totally fine.
If you have a ceramic mug or a bowl, turn it upside down exposing the bottom and sharpen your knife there. A honing rod works well, too. So does a leather belt, or your car window. For more tips, here’s an article: https://myoutdoorslife.com/diy/how-to-sharpen-a-pocket-knife.html
These are just some of the basics which anyone can learn. Sharpening a knife using a whetstone is easy. You can even use a honing rod that you have inside your kitchen. Maintaining the sharpness of your camping blade is important, just as you would do with your kitchen knives.