
To make a DIY water filter, layer natural materials like gravel, sand, and charcoal inside a container such as a plastic bottle so the water passes through from coarsest to finest. This clears out sediment, debris, and some impurities, but it does not kill bacteria, parasites, or viruses, so you must always boil or chemically treat the filtered water before drinking it.
My two decades of outdoor exploration have taught me one vital survival skill, which is how to make my own water filter. I’m here today to share that knowledge, so let’s dive into the world of DIY water filtration.
Without water, survival is measured in days, not weeks. Dirty water, or salt water, which I covered here, is worse than no water at all, because it trades dehydration for something potentially far more dangerous, which is waterborne illness.
In this guide I’ll walk you through four different methods, from basic sand filtration to a technique backed by MIT research. I’ll also be straight with you about what these filters can and can’t do, because that honesty might matter more than anything else here.
So let’s get started and learn how to make a water filter, with a few methods that are easy to learn.
Related post: How to Purify Water With Bleach
Filtering vs. Purifying: The Difference That Keeps You Safe
Before any method, understand this crucial distinction, because confusing the two is how people get sick in the wild.
Filtering removes physical material from water, including dirt, sediment, debris, and some larger organisms. A DIY filter made from sand and charcoal does this job reasonably well, and it makes cloudy water look clear.
Purifying kills or removes the microscopic threats that actually make you ill, including bacteria, protozoa like Giardia and Cryptosporidium, and viruses. DIY filters do not reliably do this.
In plain terms, a homemade filter makes water cleaner, not safe. The golden rule for every method below is simple: filter first, then boil. Filtering clears the gunk so your purification step works better, and boiling finishes the job by killing what the filter left behind.
Before You Start: What You’ll Need
The basic setup is the same no matter which method you choose.
- A container to collect the unfiltered water
- A second container to hold your filter materials
- A third container to store the filtered water
- The will to build your filter
That’s the universal kit. What goes inside the filter depends on the method, which I’ll cover in each section below.
1. The 3-Step Sand Filtration Process
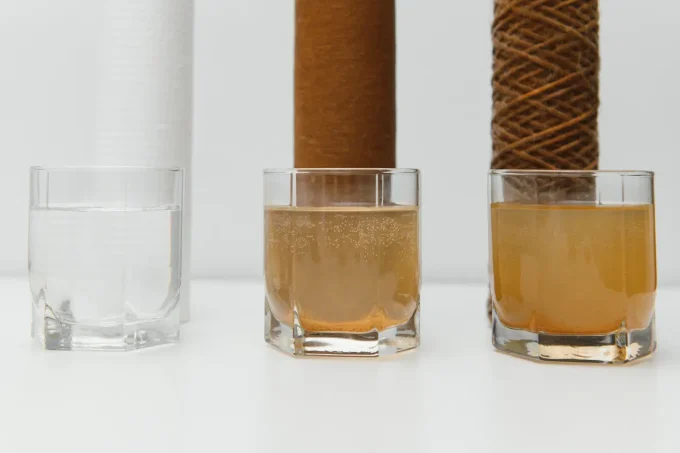
The sand filtration process is a straightforward method that uses modest natural resources to turn murky water into something far more drinkable. Here’s how to do it.
Step 1: Craft Your Container
A sturdy container is the cornerstone of your makeshift filter. In a natural environment where plastic containers are a luxury, a piece of tree bark works wonders. Mold it into a cone shape and leave a small hole at the narrow bottom for filtered water to trickle into your collection vessel. Secure it with string or any available material so it holds together, and make sure the smaller end faces downward in a funnel shape.
Step 2: Gather Your Filter Materials
Next, fill your cone with filtering components in layers.
- Pebbles and sand
- Non-toxic grass to form a mesh
- Cotton cloth, if available, to strengthen the mesh
Start by layering the grass mesh and pebbles at the bottom of the cone. I like to add a layer of gravel for extra filtration and to keep the materials from jumbling together. Then comes the star player, sand. Add handfuls of sand on top of the other materials until you’ve filled a good part of the cone.
Step 3: Filter Your Water
Collect water from your source in your first container, then steadily pour it into the cone. Watch as it trickles through the layers and emerges clearer into your receiving container. Congratulations, you’ve just filtered your water.
If the first run leaves you with less than clear water, don’t worry, since repetition is how this works. Run it through again until you’re satisfied with the result. A hot tip from my many expeditions is that swapping out the filter material regularly makes a real difference. And to make it safe to drink, boil it afterward, because bacteria and other microorganisms can still be present after filtering this way.
2. The 3-Step Charcoal Process

Let’s face it, the water you find in the wilderness is usually muddy, dirty, and unappetizing. The sand process above handles that first layer of grime well, but if you suspect more dangerous elements are present, like Giardia lamblia or other microorganisms, and you should always assume they are, you need to take extra precautions.
Never rely on sand filtration alone for safety, because it doesn’t kill bacteria or parasites. Boiling does. But when boiling isn’t possible, charcoal is the most valuable additional step you can take, and you can use it either on its own or after running water through the sand process first.
The best part is that charcoal is easy to make if you don’t have any on hand. Here’s how.
- Make a fire. Let the wood burn down into a hot bed of coals. Cover the coals with dirt and let them cool, and you’ll have your charcoal.
- Set up filtration. Get your cone or filter container ready. Add a layer of crushed charcoal, top it with sand, and leave space to pour in your water.
- Collect your water. Pour the water in and collect it as it flows out, cleaner for having passed through the charcoal and sand.
Even with charcoal in the mix, you’re still working with a filtration system, not a purification one. Charcoal removes sediment, some impurities, and odors, but it does not reliably eliminate viruses or all bacteria. Boil the output whenever you possibly can.
Charcoal vs. Activated Charcoal: Which Is Better?
Regular charcoal does a solid job, but activated charcoal is the stronger choice because its vastly larger surface area adsorbs far more impurities and odors. If you’ve got some in your pack before heading out, great. If not, regular campfire charcoal works perfectly fine.
Regular charcoal has been used in water purification for centuries, even for controlling the odor of putrefying fish between the fourteenth and seventeenth centuries. The bottom line is that activated charcoal should always be your top choice, but if it isn’t available, any type of charcoal is acceptable. Just make your own and filter with it.
3. The Agave Stalk and Cork (Xylem) Processes
If you’re in a region where agave grows, think deserts and dry climates, the agave stalk makes a surprisingly effective natural filtration tube. Cut out a section, hollow it, fill it with charcoal and sand, pour water in, and collect what comes out. Here’s the full method.
Agave Stalk, Step by Step
Step 1: Cut a section of agave stalk and split it down the middle to hollow it out. Hollow nearly all of it, but leave about six inches at the bottom intact. The plant grows up to about twenty-five feet, but a six-foot section is all you need.
Step 2: Make a fire for charcoal, then fill about four feet of the stalk with a charcoal layer and about one foot with sand, leaving the top two feet or so free to hold the water you’re filtering. Tie the stalk back together along the split sides to hold your charcoal in place.
Step 3: Pour the water into the top of the stalk and watch your DIY filter work as it seeps through the charcoal and drips into your collection container.
The Cork (Xylem) Process
This is the method I find most fascinating, because it has serious science behind it. What survival circles have long called the “cork process” is a simple version of xylem filtration, something MIT researchers have studied in depth and published on. The sapwood of a branch contains tiny pores that can trap bacteria-sized particles as water passes through. Here’s the field version.
Step 1: Get a hose or an empty plastic bottle and cut off the broader end of the bottle.
Step 2: Cut a branch from a tree, preferably a white pine, and trim it down to the size of a cork. Peel off the bark and insert the fresh sapwood into one end of the hose, or the narrow end of the bottle. Fasten it tightly so water can’t slip past the sides, then pour your water in.
Step 3: Collect the filtered water as it slowly seeps out through the pores of the sapwood. Note that this method is slow, and the sapwood must stay fresh and wet to keep working, so it’s more of an ingenious backup than a high-volume solution.
4. The Plastic Bottle Filter
This is probably the most practical method in this entire article, and the one I reach for first when I have the materials. Most people in an emergency have a plastic bottle nearby, which makes this the easiest method to pull off.
What you need: an empty plastic bottle (one liter or larger, with a two-liter being ideal), fine sand, small pebbles or gravel, grass or cloth, and charcoal if you made some using Method 2.
Step 1: Cut off the bottom of the bottle. This open end becomes the top of your filter, where you pour the dirty water in.
Step 2: Invert the bottle so the cap end points down. Punch a small hole in the cap, or unscrew it slightly, so filtered water can drip through into your collection container.
Step 3: Layer your materials from the cap end upward. Start with grass or cloth at the cap end as a natural strainer, then add two to three inches of charcoal, two to three inches of fine sand on top of that, and finally two to three inches of small pebbles or gravel at the top.
Step 4: Hold or prop the bottle over your collection container, pour the dirty water in through the open bottom, and let gravity do the work.
The order of layers matters here. The pebbles and gravel catch the largest debris first, the sand filters out smaller particles, and the charcoal handles impurities and odors. If the output still looks murky, run it through again. And as with every method in this guide, filter, then boil.
DIY Water Filter Methods Compared
| Method | Best for | Needs charcoal? | Still must boil? |
|---|---|---|---|
| Sand filtration | Clearing muddy, sediment-heavy water | No (better with it) | Yes |
| Charcoal process | Removing odors and more impurities | Yes | Yes |
| Agave stalk | Desert and dry climates | Yes | Yes |
| Cork (xylem) | Clever low-tech backup, small volumes | No | Yes |
| Plastic bottle | The most practical all-rounder | Optional | Yes |
When These Methods Won’t Be Enough
There’s one scenario I want to be completely straight about. If your water source is chemically contaminated, no DIY filter in this article will make it safe to drink.
Chemical pollutants like heavy metals, pesticides, arsenic, and industrial runoff are not removed by sand, charcoal, sapwood, or any combination of them. They’re invisible, they have no smell, and boiling won’t help either. In fact, boiling chemically contaminated water concentrates those toxins as the water evaporates.
If you’re near heavy industry, farmland with fertilizer runoff, or anywhere you have reason to suspect chemical contamination, these methods are not sufficient on their own. In a true survival situation you may have no choice but to use them anyway, but going in with that knowledge lets you make a more informed decision. Whenever possible, rainwater or dew collected from non-poisonous plants is a cleaner starting point than chemically suspect surface water.
This is also why a proper backup belongs in any serious pack. A quality portable water filter like the Sawyer Mini removes bacteria and protozoa to a far finer level than any DIY setup, and lightweight water purification tablets handle disinfection when you can’t boil. DIY skills are for when your gear fails or runs out, not a replacement for carrying the right tools in the first place.
Frequently Asked Questions
Does a homemade water filter make water safe to drink?
No, not on its own. A DIY filter removes dirt, sediment, and some impurities, which makes water cleaner and clearer, but it does not reliably kill bacteria, parasites, or viruses. Always boil or chemically treat filtered water before drinking it.
What materials do you need to make a water filter?
The essentials are a container (a plastic bottle works best), plus layers of small pebbles or gravel, fine sand, and charcoal, with grass or cloth as a strainer at the bottom. You also need separate containers to collect the dirty water and store the filtered water.
What order do the layers go in a DIY water filter?
Working in the direction water flows, the coarsest material comes first and the finest last. In a bottle filter with the cap pointing down, that means cloth or grass at the cap, then charcoal, then fine sand, then pebbles and gravel at the top where you pour the water in.
Does charcoal purify water?
Charcoal improves water by removing odors, some chemicals, and impurities through adsorption, and activated charcoal does this best. However, it does not reliably kill bacteria, viruses, or parasites, so charcoal-filtered water still needs to be boiled or disinfected.
Can you filter water with a plastic bottle?
Yes. Cut off the bottle’s base, invert it, and layer grass or cloth, charcoal, sand, and gravel inside, then pour water through the open end. It’s the most practical DIY method for emergencies. As always, boil the output before drinking.
Will a DIY filter remove chemicals or salt?
No. Homemade filters cannot remove dissolved chemicals, heavy metals, or salt, and boiling won’t help either. For salt water you need distillation or desalination, and for chemically polluted water you should find a cleaner source entirely.
Wrapping Up
There you have it. With a little creativity and a thirst for adventure, water filtration in the wilderness can become second nature. Just never forget the golden rule that ties all four methods together: filtering makes water cleaner, but only boiling or proper disinfection makes it safe, so filter first and then boil whenever you can.
Next time you’re out there, remember that nature provides, and many of the keys to survival are all around you. Carry a real filter and purification tablets as your first line of defense, keep these DIY skills in your back pocket for when gear fails, and you’ll be ready for whatever the trail throws at you. Happy adventuring, folks.
Do you have a go-to method for filtering or purifying water in the wild? Share it in the comments below so other readers can learn from your experience.

Daniel is a gear freak when it comes to hiking, climbing and camping. He went to REI Outdoor School to meet new people and learn best practices. Don’t even try to argue with him about the latest backpack or ice axe, he tried most of them. Daniel’s dream is to climb Mount Everest.
I’ve tried and tested the charcoal method myself. Charcoal, like char cloth which is often used for tinder (but any charcoal will do in a pinch, especially activated), is what you get when you burn wood in a hypoxic environment. The charcoal can be left in the water for a while, but there must be a changing schedule. Remember that we’re not removing the bacteria with the charcoal; what we’re removing are the toxins that are present in the water, which were not removed by boiling.
That’s right Molly. Charcoal is indeed a good filtration tool to use. No wonder that most filters today still use the charcoal for cleaner water.
We’ve tried the sand filtration method before but not for survival, only as a way of testing it out. Luckily, there is a loose tree bark nearby which was easily made into a cone shape. Using a mix of gravel, pebbles, grass and a cotton cloth, the filtered water was good enough for washing and we needed to boil it to ensure safety for drinking.
Did you find it easy to do, Liz? My nephews used to do those filtration methods just to test how well they can do it. I think it’s a good practice to try these out for yourself prior to any difficult survival needs. I hope you will never use it for any dire situation, though.