
Your favorite leather boots are failing, and the timing couldn’t be worse. Maybe you have a massive trek planned, or you finally achieved that perfect, blister-free fit that took months to earn.
Buying a new pair is an option, but new leather requires a grueling break-in period before it’s trail-ready. Repairing your leather hiking boots is often the smarter, more sustainable choice to keep your momentum.
This guide covers how to identify terminal damage, fix delaminating soles, patch holes, and restore waterproof barriers so you can stay on the trail without the $300 price tag of a replacement.
The Hiker’s Repair Toolkit
Before you start, gather these supplies. Using the wrong adhesive is the fastest way to ruin leather.
- Barge Cement or Shoe Goo: These stay flexible. Never use standard super glue; it dries brittle and will crack the leather.
- Sewing Awl (Speedy Stitcher): For heavy-duty seam repair.
- Sandpaper (80-120 grit): To prep surfaces for bonding.
- Isopropyl Alcohol: To remove oils and old glue.
- Leather scraps or Cordura patches: For internal hole reinforcement.
- Clamps or heavy weights: To ensure a permanent bond.
See Also: Best Shoes for Plyometrics
Identify the Problem: DIY vs. The Cobbler
A hole in the leather or a peeling sole is easy to spot, but not every issue is a DIY job. Being able to mend a shoe depends on which part is failing. In some cases, a cobbler is necessary; in others, you just need the right technique at home.
The “Hydrolysis” Test
If the foam midsole between the leather and the rubber sole feels crumbly or sticky like old gum, the boot has “hydrolysis.” This is a chemical breakdown of the polyurethane. No DIY glue will fix this; the boots need a professional resole or replacement.
If the leather is simply scuffed, a seam is popping, or the rubber is peeling away from the leather, you can handle it. Making the most of your shoes means knowing how to fix small breaks before they become “trail-enders.”
How to Fix Holes and Cracks
Leather hiking boots are famous for durability, but they eventually show wear at the flex points – the creases where your foot bends. If you catch these early, you can get a few more waterproof years from them.
To mend holes, you need spare leather, clear-drying flexible glue (like Barge Cement), sandpaper, and matching shoe polish.
- Clean the area: Spend time ensuring the boots are perfectly clean. Focus on the area around the hole.
- Dry completely: Never work on damp leather.
- Sand the surface: Use sandpaper to roughen the area where the patch will go. This gives the glue “teeth” to grab onto.
- The Internal Patch: Instead of a bulky external patch, try gluing your spare leather piece to the inside of the boot. This maintains the boot’s shape and prevents the patch from catching on rocks or brush.
- Apply Glue: Spread the adhesive onto the patch and the boot. Follow the product instructions – most contact cements require you to let the glue sit for 5–10 minutes until tacky before pressing them together.
- Apply Pressure: Support the inside of the boot with a tennis ball or your hand. Apply firm pressure from the outside to eliminate air gaps.
- Finish: Apply a coat of wax or polish to blend the repair.
See also: How to Make a Walking Stick: Step by Step Guide
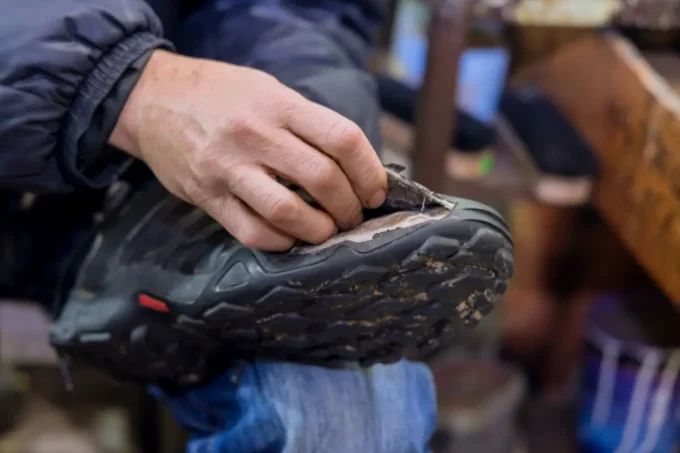
How to Fix Sole Delamination
If the sole of your shoe starts to part from the uppers, it is often due to heat exposure. Don’t store your shoes in a hot car, near a fire, or in direct sun.
When the sole peels (delamination), it looks distressed, but it is salvageable. While a full sole replacement is a job for a cobbler, re-bonding a peeling sole is a standard DIY task.
Tools needed:
- Acetone or Isopropyl Alcohol
- Sandpaper
- Shoe adhesive (Barge Cement is the industry standard)
- Small wooden blocks and clamps
Step-by-Step Guideline:
- Remove debris: If the sole is only partially peeling, don’t rip it off. Use a screwdriver to gently clear out dirt or old, flaky glue from the gap.
- Clean the surfaces: Use a rag with acetone to clean the underside of the leather and the top of the rubber sole. This removes oils that prevent glue from sticking.
- Sand it down: Sand both the leather underside and the bonding surface of the sole.
- Apply adhesive: Spread a thin, even layer of adhesive on both surfaces. Wait until it is tacky (usually 10-15 minutes).
- Align and press: Start at the point furthest from the peel and work toward the edge. Ensure there are no bubbles.
- Hammer and Clamp: Use a hammer to gently tap the sole, ensuring the bond is tight. Use wooden blocks and clamps to hold the sole and upper together for at least 24 hours.
See also: DIY Tent Footprint
How to Toughen Up Scuff Points
If you hike in rocky terrain, you’ve likely kicked a few stones. These marks wear down the leather, leading to tears and reduced water resistance. You can rebuild this area before the boot needs a total revamp.
Check the inside of the shoe for any bumps where the scratch is. If the interior is damaged, you may need the internal patch mentioned in the “How to Fix Holes” section.
Avoid using super glue for scuffs; it will crack under the pressure of your stride. Use a flexible protector like Shoe Goo or Tuff Toe.
Dab the product over the scuff, ensuring it covers the entire weakened area. These products act like a “sacrificial layer” that takes the abuse so your leather doesn’t have to. You can cover this with polish, though it isn’t always necessary.
How to Repair Broken Stitching

Repairing broken stitching on leather is possible even though the material is tough. A standard needle and thread will snap.
You need a Speedy Stitcher or a similar sewing awl. This tool allows you to stitch through leather with the precision of a machine. It uses diamond-point needles and high-tensile waxed thread.
The Gore-Tex Warning
If your boots have a waterproof liner, remember that every time you push a needle through the leather, you are puncturing that liner. To maintain waterproofing, you must apply a seam sealer (like Aquaseal) over your new stitches once you are finished.
How to Resew a Seam:
- Trace your path: Use a white pencil to mark the original stitching line.
- Overlap: Start two or three stitches before the break. Sew over the existing, healthy stitching to “lock” it in place.
- Follow the holes: Try to use the original needle holes in the leather. This prevents creating a “perforation” effect that could make the leather tear easily.
- Double stitch: Always end with a double stitch and a knot to prevent unravelling.
- Seal: Use beeswax or a flexible urethane adhesive over the thread to block out water and protect the thread from abrasion.
See also: Best Bushcraft Knife This Year
Fixing Hardware and Linings
Sometimes the leather is fine, but a metal lace hook snaps or the interior heel lining wears through, causing blisters.
- Lace Hooks: You can buy replacement “speed hooks” at most craft stores. They usually install with a simple rivet. Tap them in with a hammer using a solid metal surface as a backing.
- Heel Linings: If the fabric inside the heel has a hole, don’t let it rub your skin raw. Use a piece of adhesive moleskin or a specialized “heel repair patch.” Clean the area with alcohol first so the adhesive sticks to the fabric.
Prevention is Better Than Cure
Regular maintenance extends the length of time your boots can carry you. A hike places immense stress on the leather; catching a weakness early means a smaller repair job.
- Cleaning: Remove dirt with warm, soapy water after every trip. Dirt acts like sandpaper, grinding down the leather fibers and the stitching every time the boot flexes.
- Conditioning: Use a leather conditioner once or twice a year. This keeps the fibers supple and prevents the “crease cracks” discussed earlier. [NOTE: Check if the specific boot brand recommends oil-based or wax-based conditioners, as some can soften the leather too much for heavy loads.]
- Waterproofing: Add a coat of beeswax or a specialized spray. This doesn’t just keep your feet dry; it prevents the leather from becoming waterlogged, which can cause it to stretch and lose its shape.
See also: Best Gore Tex Hiking Shoes
Conclusion
Your hiking boots are your most vital travel partners. They carry you to mountain peaks but can turn a trek into a nightmare if they cause pain. Repairing them preserves the memories and the fit you’ve worked hard to achieve.
Instead of searching for a new pair, try these repair tips to keep your boots on the trail. If you have a specific repair success story or a question about a tricky tear, share it in the comments below!

Daniel is a gear freak when it comes to hiking, climbing and camping. He went to REI Outdoor School to meet new people and learn best practices. Don’t even try to argue with him about the latest backpack or ice axe, he tried most of them. Daniel’s dream is to climb Mount Everest.
Thank you for this article Daniel. I already shared this to my friends. I particularly like the way to discussed about repairing broken stitching on leather shoes because this has always been a problem of mine. I have a lot of leather shoes which I cannot use anymore because they need to be fixed.
Thanks for reading!
I have used Shoo Gloo and it is really awesome, it saved me so much money to be honest. I have never replaced a sole of my shoes myself, but this guide will help me next time. You have listed the instructions clearly that’s why I enjoyed reading this very much.
Thanks!
Acetone will help you clean the rubber layer until all the excess glue and debris are gone. Share the tips with your hiking buddies.
Most hikers will easily throw away their hiking boots because of simple damages, especially ones associated with soles. So, this article should prove helpful to any outdoorsperson.