
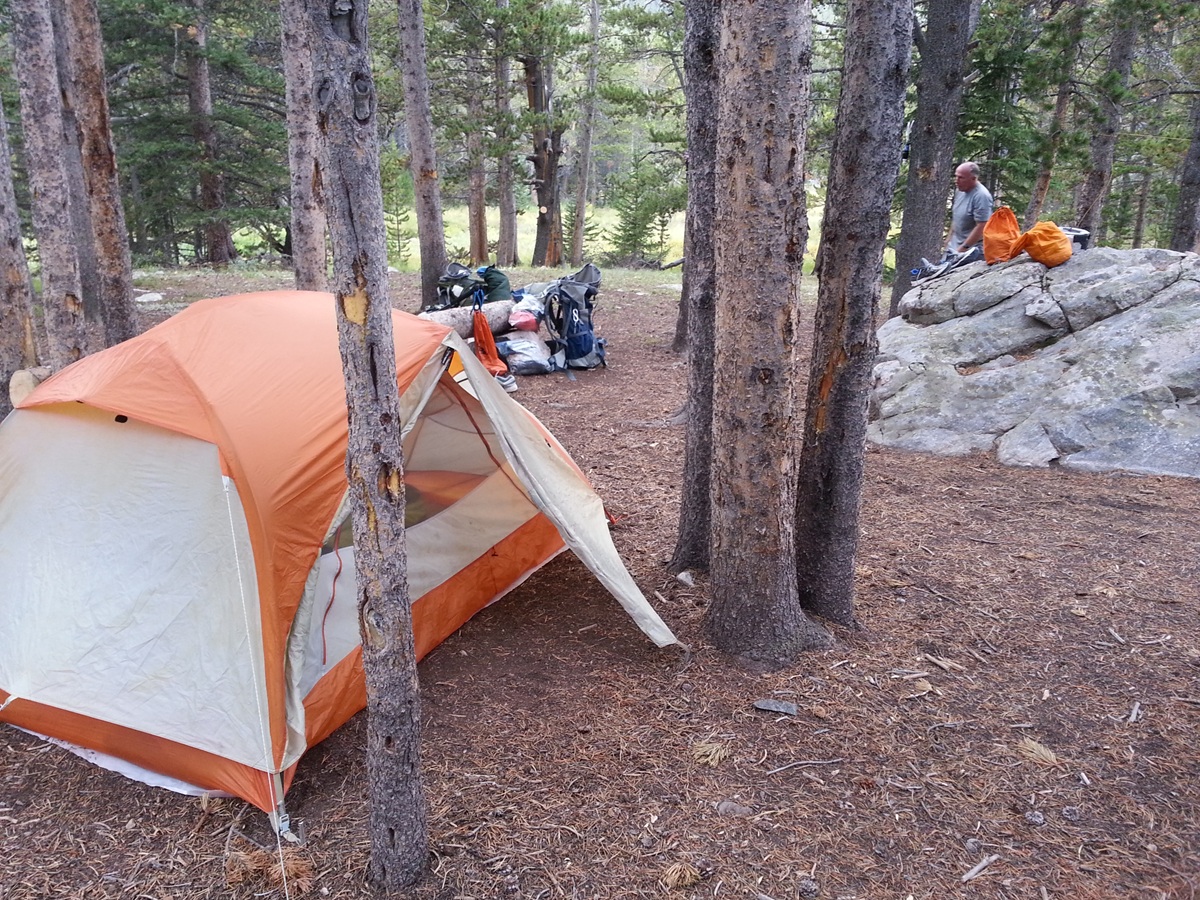
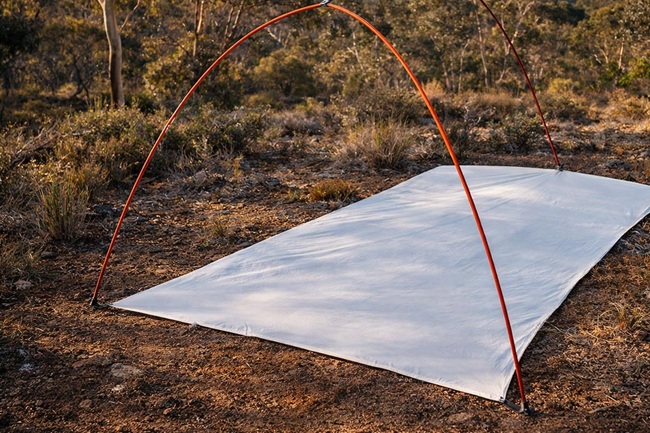
To make a DIY tent footprint, pick a tough, waterproof material like Tyvek, a tarp, or a painter’s dust sheet, cut it to your tent’s base dimensions minus a couple of inches so it sits slightly inside the tent edge, reinforce and tape the seams, and add corner grommets with nylon cord to stake it down. A homemade footprint costs a fraction of a store-bought one and protects your tent floor from punctures, abrasion, and moisture for years.
Every avid camper benefits from a footprint, that protective layer between the tent and the ground that helps preserve your tent floor so it lasts far longer. This tutorial shows you exactly how to make one at home step by step, so you don’t overpay for something that’s genuinely easy to build. You can buy footprints in camping stores, but when all you really need is a good tarp or similar material, making your own saves money, and here’s everything you need to know.
Best Materials for a DIY Tent Footprint
The fabric you choose largely determines how long your footprint lasts and how much it weighs. Here are the most popular options among campers and backpackers.
Tarp
A heavy-duty tarp is cheap, widely available, waterproof, and flexible, which is why so many campers reach for it first. A tarp doubles as an emergency shelter, rain fly, or a clean ground sheet to sit on. The downsides are weight and durability, since cheaper tarps are heavy and can break down after repeated use. If weight isn’t a concern and you don’t mind replacing it every few years, a tarp is a solid, inexpensive choice. For more options, see our review of the best tarps.
Window Insulation Film
Window wrap is the clear plastic shrink film you heat-seal over windows for winter insulation, from brands like Duck Brand and Frost King. Backpackers love it because it’s extremely cheap, waterproof, and ultralight, and a single sheet can last a season depending on use. Some brands come narrow, so you may need to tape a couple of widths together to fit your tent. The catch is that it’s thin plastic, prone to tears and punctures on rocky ground, so expect to replace a window film footprint roughly every year.
Dust Sheet or Painter’s Drop Cloth
Painter’s dust sheets aren’t just for protecting furniture, since they also make capable tent footprints. The best type is the non-woven variety, which is usually coated to resist paint, and that same coating resists water seepage under your tent. You can often buy them pre-cut close to your tent’s dimensions, ready to use. Dust sheets are strong and affordable, though a bit on the heavy side.
Tyvek Sheet
Tyvek, made from high-density polyethylene (HDPE), is water-resistant, breathable, strong, lightweight, and highly tear-resistant. Those qualities make it a favorite among backpackers and the same material many brands use for their own footprints. You can find Tyvek at Home Depot, Lowe’s, or online, sold by the yard or the roll, so work out how much you need before buying. For most people, Tyvek is the best all-round DIY footprint material.
How to Make a DIY Tent Footprint: Step by Step
Once you’ve chosen your material, follow these steps. Read through the whole tutorial first and gather everything you need before you start.
1. Make a Plan
There are many footprint designs. Some add an extra flap in front of the door, creating a small porch area to stand on or leave shoes, while others are a simple rectangle sized to the tent base with a little margin. Decide on your design first so you can measure and cut accurately.
For a basic rectangle, start by measuring your tent’s base. Say it measures 86 by 52 to 42 inches because it tapers. Add about 3 inches at the corners to reinforce where the grommets go, which means you’d need roughly a 92 by 58 inch piece of Tyvek. Those corner grommets let you loop nylon cord to the tent’s stakes so the footprint stays put.
2. Measure and Mark Where to Cut
Work in a large, flat area where you can lay the whole sheet out. Lay the material down, make sure it’s taut, and either mark your measured outline with a marker, or, easier still, set your tent up on top of the sheet and trace around it, leaving at least 3 inches of allowance on all sides. The allowance ensures the cut sheet is slightly wider than the tent base so you can trim it back later.
3. Cut to Size
Cut along your outline with sharp scissors or a utility knife. If you measured correctly, the footprint will match your tent snugly. Here’s the one rule that matters most: your finished footprint should sit slightly smaller than the tent floor, tucked just inside the edges. If it sticks out past the tent, rain runs off the fly and collects on the exposed footprint, then pools underneath your tent, which defeats the whole purpose.
4. Reinforce and Tape the Seams
Strengthen the edges so they resist tearing. With Tyvek, the easiest method is to fold the edge over and run a strip of Tyvek tape (or strong waterproof tape) along it, which flattens and reinforces the edge in one step. If you prefer contact cement, pre-fold the edge, flatten it with a rolling pin, apply the cement as directed, then roll again for good contact. Work your way around the whole sheet so the perimeter is reinforced against tears and punctures.
5. Add Grommets
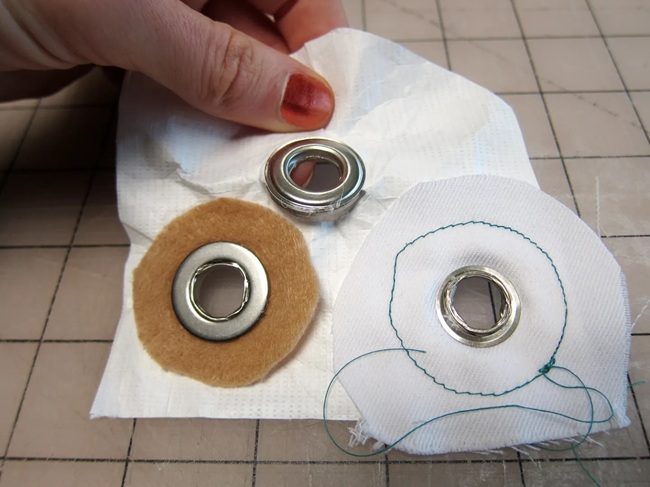
Use a grommet kit to set grommets at all four corners, positioned to line up with your tent’s pole or stake points. If your kit has a tool, just follow its instructions. To do it manually, lay the male part of the grommet on the fabric, trace the inner hole with a pencil, mark an X in the center, and cut it with a box cutter or craft knife. Push the male part through from below, place the female part on top, set the setter over it, and give it a few firm hammer taps. Repeat on all corners.
6. Attach Nylon Cord
Tie loops of nylon cord through each grommet to secure the footprint to your tent stakes. Do a trial setup with the tent fully pitched on top so you can measure the right cord length before tying everything off.
How to Make a Tent Footprint in the Field
If you forget your footprint, you can improvise with what you have. The easiest option is a tarp: just lay it under the tent, making sure to fold any excess under so no edges stick out past the tent floor.
No tarp? Garbage bags work in a pinch:
- Work out how many bags you need to cover the tent base. If you’re short, cut the bags open and spread them flat.
- Tape them into one large rectangle and pitch your tent on top. Without tape, overlap the bags generously, then carefully pitch the tent over them, moving as little as possible.
- Weigh the corners down with rocks, since you can’t stake garbage bags through grommets.
If you have no waterproof material at all, think twice before using natural materials, which aren’t waterproof and can snag and damage the tent floor. Camping without a footprint is fine as long as your tent has a waterproof floor and you’re using a sleeping pad.
Why You Need a Tent Footprint
A footprint is cheap and replaceable, but it does an important job: preventing punctures, tears, and stains to your far more expensive tent floor. Pebbles, roots, sticks, and pine cones can make sleep uncomfortable and, worse, can puncture a tent floor and leave you patching it in the field. A footprint takes that abuse instead. It also adds a waterproof barrier, which matters since not all tents have fully waterproof floors, and it insulates slightly against cold ground.
Make a larger footprint and it doubles as clean space outside the door for bags, boots, and sitting, and it keeps mud and grit out of the tent, making cleanup easier. If you’re weighing a footprint against a tarp, see our comparison of tent footprint vs. tarp to decide which suits you.
Making vs. Buying a Tent Footprint
So should you make or buy? Here’s how they compare.
Material. Making your own lets you use whatever you have on hand, like a spare tarp, old dust cloth, or window film, often for free. Buying gives you access to purpose-made materials and a guaranteed fit if you buy the model matched to your tent.
Convenience. A DIY footprint can take a couple of hours to build, faster with experience. A store-bought one is as convenient as it gets, since you can order it online without leaving home and it arrives ready to use.
Affordability. This is where DIY wins. You can make a footprint for as little as around $20, or less if you recycle materials you already own. Store-bought footprints cost significantly more, especially from premium brands, often for the same materials you could buy yourself.
A footprint isn’t always essential, and some ultralight campers skip it to save weight, but it’s genuinely valuable on rocky, cold, or wet ground. Being able to leave muddy boots outside and keep the interior clean and dry is reason enough for many campers to carry one.
Frequently Asked Questions
What is the best material for a DIY tent footprint?
Tyvek is the best all-round choice, since it’s lightweight, strong, water-resistant, tear-resistant, and the same material many commercial footprints use. Tarps are cheaper but heavier, window film is ultralight but less durable, and painter’s dust sheets are strong but a bit heavy.
Should a tent footprint be smaller than the tent?
Yes. Cut the footprint slightly smaller than the tent floor so it tucks just inside the edges. If it sticks out, rain runs off the fly onto the exposed footprint and pools under your tent, which is exactly what you’re trying to avoid.
How much does it cost to make a tent footprint?
A DIY footprint can cost as little as around $20 in materials, and even less if you reuse a spare tarp or dust cloth. That’s typically far cheaper than a brand-name footprint made for your specific tent.
Do I really need a tent footprint?
You don’t always need one, but it protects your tent floor from punctures, abrasion, and stains, adds waterproofing, and insulates against cold ground. It’s most valuable on rocky, wet, or cold sites. Ultralight campers sometimes skip it to save weight.
Is Tyvek a good tent footprint?
Yes, Tyvek is one of the best DIY footprint materials. It’s breathable, water-resistant, very tough for its weight, and resists tearing, which is why it’s widely used by backpackers and gear manufacturers alike.
Can I use a tarp as a tent footprint?
Absolutely, a tarp is a popular and inexpensive footprint. Just make sure to fold any excess under so no edge extends past the tent floor, otherwise rainwater can collect on it and run underneath your tent.
Conclusion
Many commercial tent footprints are overpriced and made from the same materials you can buy at a hardware store. Making your own is an easy, affordable way to protect your camping investment, and it takes only a couple of hours. With a little planning and the right material, you’ll have a durable footprint that extends your tent’s life for many seasons. For your next step, read our guide on how to pitch a tent.
Have you made your own tent footprint, or do you have a favorite material or tip? Share it in the comments below.



Wow this step-by-step guide is awesome. It is nice to know that I can do it as a DIY project. I’ve always loved building things from scratch so this is perfect. I can’t believe it will only cost me as little as $20 because store-brought can really be expensive. Kudos to you!
You can create a decent footprint by taking a regular tarp and setting up your tent on top of it. This will not cost you anything but effective DIY skills.
Well this is a really nice project especially for those who love do it yourself activities. We are planning to go camping and we will need a tent footprint. I already checked out some brands online, but I did not order one yet. I will give this a try first and see what happens. Wish me luck!
Good luck! As an enthusiast outdoorsperson, you should always try new challenges. So, instead of buying a brand new footprint for your tent, you can simply learn how to make one from scratch.
One thing that I have leant over the years as a camper, hiker, and mountaineer is that DIY skills are extremely important. So, make sure you learn how to make a tent footprint, you never know when you will need to make one.