

There’s a moment on every long hike when your legs get heavy, your pace slows, and you realize you’ve burned through the granola bar you packed an hour ago. That’s the moment homemade energy bars are built for.
Store-bought bars are convenient, but a lot of them are little more than candy bars in disguise, loaded with added sugar, syrups, and coatings that spike your energy and drop you just as fast, right when you need steady fuel for the next ridge. Research on U.S. sugar intake shows the average American consumes around 22 teaspoons (roughly 355 calories) of added sugar a day, and most of it comes from packaged and processed foods, energy bars included.
Making your own energy bars means you control exactly what goes in your pack: real carbohydrates for sustained energy, healthy fats and protein for muscle recovery, and none of the preservatives, artificial sweeteners, or excess packaging you don’t need on the trail. They’re also cheaper per bar, easier on your stomach, and can be customized to survive a hot afternoon in your backpack without turning into a puddle.
This guide walks through what makes a good hiking energy bar, when to eat one, and three tried-and-tested recipes you can make at home before your next trip. For more trail-ready options, check out our guide to the best hiking snacks and our best energy bars review if you’d rather buy than bake.
What Are Energy Bars, and Why Do Hikers Need Them?
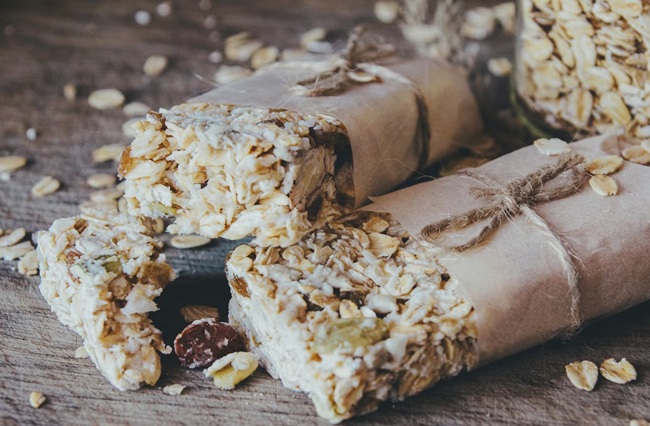
Energy bars are compact, high-energy foods designed to keep you moving without slowing you down to cook or dig through a cooler. For hikers, that matters more than for almost anyone else: you’re carrying every calorie you eat, often for hours at a time, sometimes at altitude, and often far from anywhere you could restock.
Energy bars are built mainly around carbohydrates, with smaller amounts of fat and protein, because carbs are the fuel your body’s aerobic system burns most efficiently during sustained activity like hiking. A good bar digests easily, releases energy steadily, and doesn’t leave you with the stomach heaviness that can turn a scenic climb into a miserable one.
Not all bars are built the same way, though. The right one for you depends on the length of your hike, the terrain, the weather, and your own nutritional needs.
Types of Energy Bars for the Trail
- Meal Replacement Bars: Higher in calories and balanced across protein, carbs, and fat. Useful for multi-day hikes or backpacking trips when you need something closer to an actual meal at lunch, without stopping to cook.
- Protein Bars: Packed with protein to support muscle recovery after a strenuous climb or a multi-day trek with heavy elevation gain.
- Endurance Bars: Higher in complex carbohydrates that digest slowly over time. Ideal for long day hikes where you need steady energy over several hours rather than one quick spike.
- Activity Bars: Similar to endurance bars but chunkier and more granola-like, designed for all-day outdoor activity that combines movement with the need to feel full.
- Organic/Whole-Food Bars: Made from simple, real ingredients like dates, nuts, and dried fruit, with no artificial sweeteners. This is the category most homemade hiking bars fall into, and for good reason: they hold up well outdoors and use ingredients you already trust.
Why Homemade Energy Bars Are Better for Hikers
Energy That Matches the Trail
A homemade bar with the right ratio of carbs, fat, and protein gives you a genuine energy boost during a climb and helps your muscles recover once you’re back at camp or the trailhead. On a long hike, that’s the difference between a strong final mile and a slow, dragging one.
A Real Meal Replacement, Minus the Weight
For day hikers and backpackers alike, a well-made bar can stand in for lunch without adding the bulk of a sandwich or the mess of a trail meal. Anyone doing serious mileage, or carrying a full pack for multiple days, benefits from a bar with enough protein and fat to actually hold them over.
No Fridge, No Fuss
Energy bars need no refrigeration, no utensils, and almost no prep once they’re made. Wrap them, toss them in a side pocket or hip belt pouch, and they’re ready whenever you need a boost. No stopping to fire up a stove or dig through a bear canister.
You Know Exactly What’s Fueling You
Because you’re reading (and choosing) every ingredient yourself, you can dial in the calories, sugar, and macronutrients to match your hike. That matters if you’re managing a specific diet, training for a thru-hike, or just trying to avoid the sugar crash that store-bought bars are famous for.
Fewer Calories, More Control
As snacks, homemade bars typically run 100–180 calories per bar; meal-replacement versions run 300+ calories. For endurance hikers, eating a bar with 25–40 grams of carbs (about 100–200 calories) roughly an hour before a big climb helps top off your energy reserves ahead of the exertion. Bars with some fat, protein, or fiber slow digestion, which is helpful for steady energy, but worth easing into gradually, since too much of any of the three right before hard exertion can cause stomach discomfort. Within an hour after a demanding stretch of trail, a bar with around 200–250 calories and a 3:1 ratio of carbs to protein supports muscle recovery.
When to Skip the Energy Bar
Energy bars are trail fuel, not an everyday snack. They’re built for sustained physical activity: a long hike, a steep scramble, a multi-day trek. It’s not for grazing on the couch. Eating one outside of that context won’t hurt you, but you’ll get more out of a real meal and save the bar for when your body actually needs the quick, dense energy it’s designed to deliver.
Making Your Own Hiking Energy Bars
Making your own bars saves money over trail-brand prices, avoids the preservatives and artificial sweeteners found in a lot of commercial options, and takes surprisingly little effort. Better yet, you can batch a large tray at home and portion it out for an entire season of hikes.
Equipment Needed
- Food processor: Blends and combines ingredients quickly and evenly.
- Plastic wrap or wax paper: Lines your pan for easy removal and wraps individual bars for the trail. Wrapping each bar separately also makes it easy to hand one to a hiking partner without unpacking the whole batch.
- Sharp knife: For cutting into eight large bars or sixteen smaller trail-sized squares.
Core Ingredients
- Brown rice syrup: A thick, caramel-flavored binder that holds crunchy or chewy bars together. Found in the natural foods section of most grocery stores.
- Dates: A simpler, no-cook binder. Ground into a sticky paste, dates act like a natural adhesive for nuts and dried fruit while adding a brown-sugar sweetness without refined sugar.
- Mixed nuts, fruits, and grains: Once you’ve made a batch or two, experiment with your own combinations. Homemade versions consistently beat anything you’ll find on a store shelf.
A Trail-Specific Tip: Heat and Packing
Bars with chocolate or a soft brown-rice-syrup binder can soften or melt in a hot pack on a summer hike. If you’re heading out in warm weather, lean toward the raw fruit-and-nut style bars below, wrap them tightly, and tuck them toward the center of your pack, away from direct sun. In cooler months or shoulder-season hikes, all three recipes below travel well.
Three Hiking Energy Bar Recipes
1. Crunchy Peanut Butter and Chocolate Trail Bars
A dense, satisfying bar with real staying power. Best saved for cooler-weather hikes since the chocolate can soften in heat. Double the rice syrup if you prefer a chewier bar. Makes eight large or sixteen small bars.
Ingredients
- ½ cup chopped, unsalted peanuts
- 1 ½ cups rolled oats
- 1 ½ cups crispy rice cereal
- ⅓ cup brown rice syrup
- 3 tsp smooth peanut butter
- 1 tsp brown sugar
- 1 tsp vanilla extract
- ¼ tsp salt
- ⅔ cup chocolate chips
Method
- Preheat your oven to 325°F. Line an 8×8-inch pan with parchment, letting the ends overhang for easy removal, and use a light coat of cooking spray to hold it in place.
- Spread the oats and peanuts on a baking sheet and toast for 8–10 minutes, until fragrant. Combine with the crispy rice cereal in a large mixing bowl.
- In a small saucepan, combine the peanut butter, rice syrup, brown sugar, vanilla, and salt. Cook over medium heat, stirring occasionally, until the mixture loosens to a pourable consistency and small bubbles form on the surface (about 4 to 5 minutes).
- Pour the syrup over the dry ingredients and stir with a heat-proof spoon until everything is evenly coated. Press the mixture firmly into the prepared pan, pushing it into the corners. Bake for 5 minutes, sprinkle the chocolate chips over the top, and bake for 2 minutes more. Spread the softened chocolate evenly across the surface. Cool overnight, refrigerating briefly if needed to help the chocolate set in warm weather.
- Slice into bars, wrap each one individually in plastic or wax paper, and store at room temperature until it’s time to pack your bag.
2. Chewy Tropical Fruit Trail Bars
Bright, fruity, and a nice change of pace on a long-distance trek. Halve the rice syrup if you prefer a crunchier texture. Makes eight large or sixteen small bars.
Ingredients
- ½ cup flaked coconut
- 1 ½ cups high-fiber cereal
- 1 ½ cups crispy rice cereal
- ½ cup chopped dried mango
- ½ cup chopped dried pineapple
- ⅔ cup brown rice syrup
- 2 tsp brown sugar
- 1 tsp vanilla extract
- ¼ tsp salt
Method
- Preheat your oven to 325°F and line your pan with parchment as in the previous recipe.
- Toast the cereal and coconut flakes together on a baking sheet for 8–10 minutes, until the coconut turns golden. Combine with the dried mango and pineapple in a large mixing bowl.
- In a saucepan, combine the brown sugar, rice syrup, vanilla, and salt. Cook over medium heat, stirring occasionally, until the syrup loosens and bubbles form on the surface.
- Pour the syrup over the dry mixture and stir until evenly coated. Press firmly into the pan, bake for 5 minutes, and cool overnight.
- Lift the bars out of the pan, slice, and wrap individually for the trail.
3. Raw Cherry-Almond Bars (No Baking Required)
The simplest recipe of the three, and a great choice for hot-weather hikes since there’s no chocolate or syrup to soften in the sun. Makes eight large or sixteen small bars.
Ingredients
- 1 cup pitted dates
- 1 cup almonds
- 1 cup dried cherries
Method
- Combine all ingredients in a food processor and blend until the dates break down and the mixture begins to clump into a ball.
- Transfer the mixture to a lined pan and press it firmly and evenly into place. Wrap tightly and refrigerate until firm.
- Slice into bars and wrap each one individually in plastic or wax paper.
Fueling Smart on the Trail
Whichever recipe you choose, aim for a mix of macronutrients rather than a bar that’s all sugar: dried fruit and grains for carbohydrates, nuts and nut butters for fat, and a source of protein, such as nuts, seeds, or protein powder, to support recovery after a hard climb.
Stored in a sealed container, most homemade energy bars keep for 1–2 weeks at room temperature, so a single baking session can fuel several hikes’ worth of snacks. Pack a few extra. Sharing one with a tired hiking partner a few miles from the trailhead is one of the better trail traditions out there.
Wrap Up
Homemade energy bars are one of the simplest ways to hike farther, feel better, and spend less doing it. Do you have a go-to trail bar recipe of your own? Share it in the comments, we’d love to hear what fuels your hikes.
And if you’d rather skip the baking altogether, check out our review of the best energy bars for hiking, ready to grab off the shelf before your next trip.


I really love energy bars and I cannot wait to try out the recipes you have listed especially the crunchy peanut butter and chocolate. Just looking at the ingredients, I already know just how delicious it would be. I also plan to make raw cherry almond bars because it looks amazing too.
All these recipes are great and we could not pick one favorite. The ones you mentioned are definitely at the top of the list, though!
I buy energy bars regularly so it is awesome to know that it is actually very easy to make. I am planning to make a batch of chewy tropical fruit snack bars this weekend so that I can bring them to work next week. I am so excited to be honest.
We love those! Enjoy!