
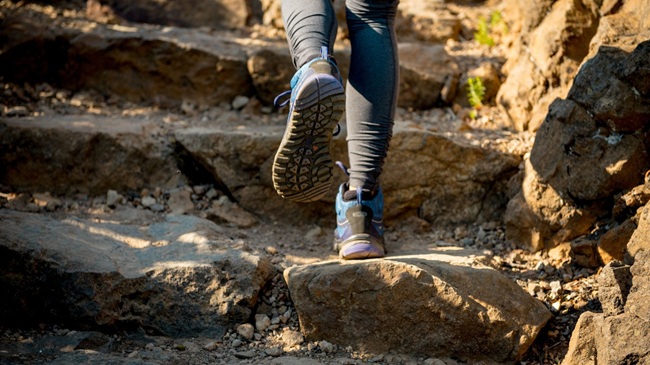
New hiking boots are exciting, but straight out of the box they’re built to fit an average foot, not yours. That mismatch is exactly why so many first hikes end in blisters, hot spots, and that long limp back to the car. I learned this the hard way after one too many ruined day-hikes, and I now break in every pair the same patient way before they ever touch a trail.
This guide walks you through the whole process: how to buy boots that barely need breaking in, how long different materials actually take, a day-by-day break-in schedule, the speed-up methods that genuinely work (and the popular one you should think twice about), plus the lacing and sock tricks that stop blisters before they start.
The short version
If you only remember a few things, remember these:
- Fit first. No break-in routine can rescue a boot that’s the wrong size or shape.
- Go gradual. House → town → light trails → short hikes → full days, increasing time slowly at each stage.
- Budget the time. Lightweight synthetic shoes may need just a few hours; stiff full-grain leather boots can take three to four weeks of regular wear.
- Manage friction, not just fit. The right socks, a heel-lock lacing knot, and early hot-spot care prevent most blisters.
Now let’s break it down properly.
Why hiking boots need breaking in at all
Boots are built around a last, a foot-shaped mold that represents an average foot for a given size. The boot is then cut and assembled to that shape. Unless your foot happens to match that average mold exactly (it almost certainly doesn’t), there will be small mismatches in width, volume, and shape that need to ease out before the boot feels like part of your foot.
Breaking in does two things at once: it softens stiff materials so they flex with your stride, and it lets the boot subtly mold to the contours of your foot. Skip it, and your foot spends the hike fighting the boot which is where friction, hot spots, and blisters come from.
Start before you buy: fit is 90% of the battle
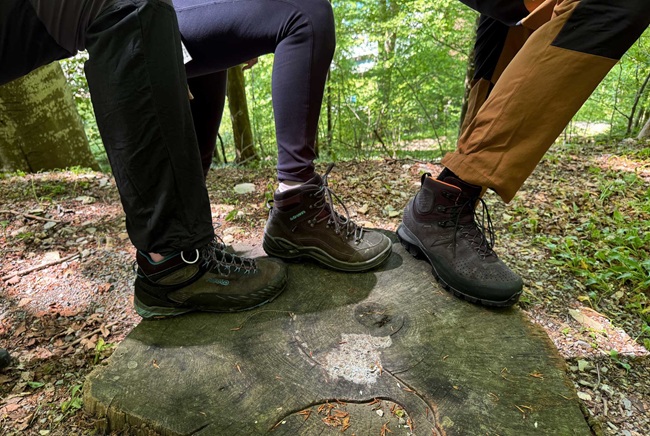
The most important part of a comfortable boot happens before you pay. A great fit makes break-in almost effortless; a poor one makes it impossible. Try on as many brands and models as you reasonably can, because lasts vary a lot between makers, the size that fits perfectly in one brand can be cramped or sloppy in another.
A few field-tested rules for the fitting room:
Shop in the afternoon or after a walk. Feet swell over the course of a day and during activity. Boots that feel perfect first thing in the morning can feel tight by mile three. Trying them on when your feet are slightly swollen gives you a more honest fit.
Wear your real hiking socks. This sounds minor and isn’t. If you try boots on in thin dress socks and later switch to thick wool ones on the trail, the boots will feel too tight. Try them in thin socks and later wear thin ones, and your foot will swim and slide. Bring the socks you actually hike in.
Stand with your full weight, laced and unlaced. The width shouldn’t feel constrictive, and you should be able to wiggle your toes freely in the toe box.
Run the finger test for length. With the boot laced, slide your foot all the way forward until your toes touch the front, then try to slip your index finger down behind your heel. It should fit snugly but without being crushed. That bit of extra length matters: on steep descents your foot slides forward, and you do not want your toes slamming the front of the boot — that’s how you get bruised, blackened toenails.
Check the heel on the balls of your feet. Rock up onto your toes and walk around the store, including any ramp or stairs they have. Your heel should stay locked in the heel cup with minimal lift. Excess heel slip is the number-one cause of blisters that no amount of breaking in will fix.
If you have wide feet, look specifically for wide or “EE” sizing rather than just sizing up, which only adds length. Hiking with kids? Children’s feet need their own fit considerations.
Get the fit right and breaking in becomes a formality. Get it wrong and you’ll be fighting the boot forever.
How long does it take? It depends on the materials
Once you’ve found the right pair, the next question is how much breaking in they’ll actually need. That comes down almost entirely to how stiff the materials are. As a rule, the more supportive and durable a boot is, the stiffer it is, and the more patience it demands.
Synthetics, mesh, and trail runners
Modern footwear has gotten dramatically lighter and more flexible. Mesh, nylon, and the rise of trail runners and low-cut hiking shoes have changed the game. These shoes flex easily and need almost no breaking in often just a few hours of everyday wear. Plenty of hikers happily go straight from the box to the trailhead with trail runners, and it’s usually fine.
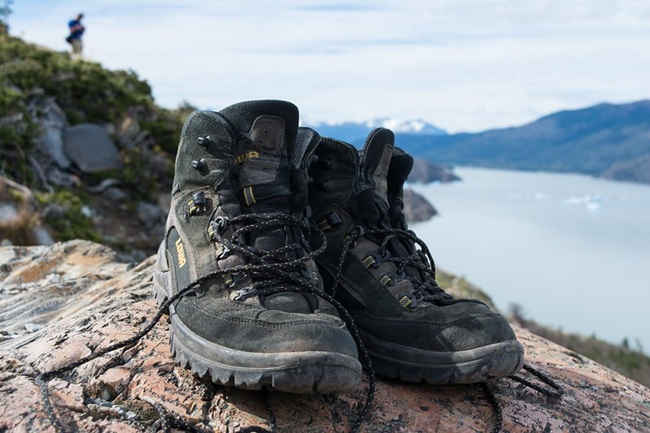
Leather
Leather is stiff out of the box but becomes one of the most supple, foot-hugging materials there is once you put the work in.
- Full-grain leather is the stiffest and heaviest, and needs the longest break-in.
- Nubuck is slightly softer and breaks in a bit faster.
- Suede / split-grain sits softer still and eases out relatively quickly.
A good leather conditioner speeds the process and extends the boot’s life. Used regularly, it keeps the leather supple rather than letting it dry out and harden.
Foam midsoles
EVA foam midsoles sound cushy, but dense, high-quality foam can be surprisingly firm. Denser foam gives better long-term support and cushioning, but it takes longer to soften than a lightweight, airy foam.
Rubber outsoles
Most boots use rubber outsoles in varying hardness. Thicker, harder rubber common on burly mountaineering boots needs more miles to flex. The thinner rubber on lightweight shoes loosens up quickly. Flexing the soles by hand can help a little.
Shanks and plates
Many boots hide a shank or rock plate in the sole for support and underfoot protection. These are meant to be rigid, so boots that have them generally take longer to feel flexible.
Rough break-in timeline by boot type
| Boot type | Typical break-in time | Notes |
|---|---|---|
| Trail runners / mesh shoes | A few hours to 1–2 days | Often trail-ready almost immediately |
| Lightweight synthetic hikers | A few days to 1 week | Minimal stiffness |
| Nubuck / suede mid boots | 1–2 weeks | Condition to speed it up |
| Full-grain leather backpacking boots | 2–4 weeks | The most patience required |
| Stiff mountaineering boots (with shanks) | 3–4+ weeks | Built to be rigid by design |
Treat these as starting points, not guarantees your mileage will vary with the specific boot and how often you wear it.
The step-by-step break-in schedule
The one true break-in method is simply wearing the boots but how, where, and for how long matters enormously. The golden rule is gradual: baby steps, building up over days and weeks. Rushing straight to a long hike is exactly how people get hurt.
Stage 1 — Around the house
Start indoors. Wear your new boots while you cook, clean, work, or just relax around the house. There are three reasons to begin here:
- You get familiar with the feel of the boot in a low-stakes setting.
- You keep them pristine and returnable, so if they’re clearly wrong you can still exchange them.
- You can pull them off the moment something hurts, no being stranded on a trail.
Begin with an hour or so, then increase each session a little at a time.
Stage 2 — Around town
Once they feel good at home, take them on short errands: walking the dog, a trip to the shops, a stroll around the block. Stick to flat pavement first, then work in some hills. Increase your time out gradually even 10–15 minutes more per outing is plenty. After a while you’ll feel like you could wear them all day.
Stage 3 — Off-road and mixed terrain
Pavement won’t tell you how the boots handle rock, gravel, roots, and uneven ground. Find a park, a dirt path, a low hill, or a small creek crossing and do some short walks on natural terrain. Try to mimic your normal hiking conditions including carrying a loaded pack, which shifts your weight and can change how the boots feel entirely.
Stage 4 — Short hikes
Now the real thing, kept short: an hour or two. Throw a pair of comfy shoes in the car to change into afterward in case a blister shows up.
Stage 5 — Full days
If short hikes feel good, step up to a full day, then an overnight or weekend trip. Make it through that comfortably and congratulations your boots are broken in. From here, resume your normal hiking habits.
Done this way, breaking in does more than soften the boots; it gives you a chance to catch any real problems while you can still return them, sparing you a world of pain later.
Methods to speed up break-in (what works, what to watch out for)
Wear them more — really
The boring truth is that miles do the work. Everything below only supplements actually wearing the boots.
The heat method (hair dryer)
Gentle heat relaxes leather and synthetics so they stretch more easily. Put on your hiking socks (thick ones) and the boots, then warm the tight spots with a hair dryer for a minute or two while flexing and wiggling your feet to stretch the material where it pinches. Don’t overheat or scorch the boot — warm, not hot. Store boots somewhere warm rather than cold, too; cold stiffens materials, warmth keeps them supple.
Leather conditioner
For leather boots, a quality conditioner or leather wax applied regularly softens the upper, speeds break-in, and dramatically extends the boot’s lifespan. This is the single best “accelerator” for leather.
Flexing the soles by hand
For thinner rubber outsoles, manually bending and flexing the sole a few times can take the edge off the stiffness. It’s minor, but it helps.
The soak-and-wear method — proceed with caution
The old-school “soak wet, wear dry” trick involves soaking leather boots in water and wearing them damp for a day so they expand and mold to your foot as they dry. (The cowboy variant has you take a bath in them.)
It’s genuinely controversial. The theory is sound for raw, unfinished leather, but most modern boot leather is pre-treated and pre-shrunk, so the benefit is small while the downsides are real: a day in soggy boots and socks is miserable and almost guarantees blisters, and improper drying can crack or harden the leather. For most 2026 boots, I’d skip it. If you do try it on a stubborn pair, condition the leather thoroughly once it’s fully dry to stop it hardening and never dry boots near direct high heat.
Stopping blisters, hot spots, and rubbing
Even with a great fit, breaking in can be uncomfortable. Expect the occasional hot spot; the goal is to stop one from becoming a blister.
Understand the chain of events. A boot that hasn’t molded to your foot yet lets the foot rub against the interior. Friction creates a warm, red patch a hot spot and if the rubbing continues, that becomes a blister. The lesson: act at the hot-spot stage, never wait for the blister.
Lock your heel with your laces. This is the most underrated fix and worth learning. Use a heel-lock (also called a surgeon’s knot) at the ankle: where the boot flexes, tie an extra twist in the laces or thread them through the upper eyelets to form loops, then run each lace through the opposite loop and cinch down. This anchors your heel in the heel cup and stops the up-and-down slip that causes most blisters. A second surgeon’s knot lower on the foot can also stop your foot sliding forward on descents.
Get your socks right. Avoid cotton, which soaks up sweat and softens skin, making blisters far more likely. Choose merino wool or synthetic socks that wick moisture. Many hikers swear by a two-sock system: a thin moisture-wicking liner under a thicker sock, so the socks rub against each other instead of against your skin.
Treat hot spots immediately. At the first sign of warmth or rubbing, stop and cover the area with a blister bandage, moleskin, padded plaster, or an anti-friction balm to create a barrier. In a pinch, some hikers tape the spot but the cleaner option is simply to take the boots off and try again tomorrow. That’s the whole point of breaking in gradually.
Mind your toenails. Keep them trimmed and filed. Long nails catch on socks, jam against the boot front on descents, and dig into neighboring toes all needless sources of pain.
Keep feet dry. Moisture softens skin and invites blisters. Wicking socks help; on hot or long days, a quick sock change at lunch can reset things.
When it’s the boot, not the break-in: customization
Sometimes you’ve done everything right and the boots are still stiff or pinching. Before writing them off:
- See a cobbler for targeted stretching of tight spots.
- Consult a boot fitter — many outdoor shops offer this, and they can heat-mold, stretch, or pad specific areas.
- Upgrade the insole. Swapping the flimsy stock insole for a quality aftermarket one can transform the fit and support of an otherwise-decent boot. It’s the cheapest high-impact fix there is.
And be honest with yourself about returns. If you’re getting significant rubbing or pain during that first round of at-home wear, the boots may simply be the wrong size or shape. That’s a sign to exchange them, not to power through. A boot that’s wrong out of the box rarely becomes right.
Frequently asked questions
How long does it take to break in hiking boots? Anywhere from a few hours to about four weeks. Lightweight trail runners and synthetic shoes are often ready almost immediately, while stiff full-grain leather backpacking boots typically need two to four weeks of regular, gradual wear. The exact time depends on the materials, the boot’s stiffness, and how often you wear them.
How can I break in hiking boots faster? Wear them often and in gradually longer sessions, condition leather boots regularly, and use gentle heat from a hair dryer on tight spots while flexing your foot to stretch the material. Upgrading the insole and learning a heel-lock lacing knot also make boots feel “broken in” sooner.
Should I soak my hiking boots to break them in? Usually no. The soak-and-wear method can help with raw, unfinished leather, but most modern boots use pre-treated leather, so the small benefit rarely outweighs the soggy discomfort, blister risk, and chance of damaging the leather. Stick to gradual wear and conditioning instead.
Why do my new hiking boots hurt even though they’re the right size? New boots haven’t molded to your foot yet, so they create friction at the heel, toes, or sides until the materials soften. Heel slip from loose lacing is a common culprit a heel-lock knot often fixes it. If the pain is sharp or persistent rather than mild rubbing, the fit may genuinely be wrong.
Can you wear hiking boots straight out of the box? With lightweight trail runners and flexible synthetic shoes, often yes. With stiffer leather boots, no — take them through a gradual break-in first to avoid blisters and foot pain on your hike.
How do I stop blisters while breaking in boots? Wear wicking wool or synthetic socks (never cotton), lock your heel with a surgeon’s-knot lacing, and cover any hot spot with a blister bandage or anti-friction balm the moment you feel rubbing — don’t wait for a blister to form.
Final thoughts
Breaking in hiking boots can feel like a slow, fussy chore, but done properly it pays you back every mile. Nothing wrecks a hike faster than foot pain, and a few weeks of patient, gradual wear is a tiny price to avoid a day of blisters and stiffness on the trail.
Breaking in slowly also gives you something valuable: the chance to catch a bad fit and return the boots before you’ve committed to them, while easing your feet into the boots in the gentlest way possible. Buy well ahead of your planned trip, give your boots the attention they deserve, and they’ll reward you when it counts.
Your boots are there to support and protect your feet — treat them as allies, not enemies. Be patient, and you’ll thank yourself on the trail.
Got a break-in trick that works for you? Share it in the comments — other hikers will thank you.
I had a bad experience wearing new boots so I really can confirm just how much important it is to break in your hiking boots. It was so bad that I even thought of postponing the other hiking schedules that we had, but I know better now. Just like what you have said, it may be a long process, but it is worth doing.
Your feet are so important to take care of, that is why breaking in boots is best. You won’t be left with sores or blisters. We hope this doesn’t discourage you in the future!
I never thought of boot customization so thank you for the tip. I purchased a pair of hiking boots months ago, which I think needs that service. It was quite expensive and to be honest I already gave up on it so it is a good thing that I came across your article.
Not a lot of people know about boot customization, but its real and you can get it! We want more people to be aware of that.