
Packing for a camping trip can feel like a lot, but the priorities are simple: shelter, water, food, and the one item people most often underpack. Aa proper first aid kit. Everything else makes your trip comfortable. Your first aid kit is what keeps a small problem from becoming a trip-ending (or worse) one when you’re hours from the nearest clinic.
This guide walks you through how to build a kit, what belongs inside it in 2026, how to tailor it to your trip, and a few first-aid practices that have changed in recent years. There’s a printable checklist near the end you can copy straight into your packing list.
This guide is written primarily for campers in the United States terminology, recommended training, and emergency response all follow U.S. norms. Where the advice differs for the UK and Australia (medication names, snakebite protocol, who to call), those notes are flagged so the guide still works wherever you’re camping.
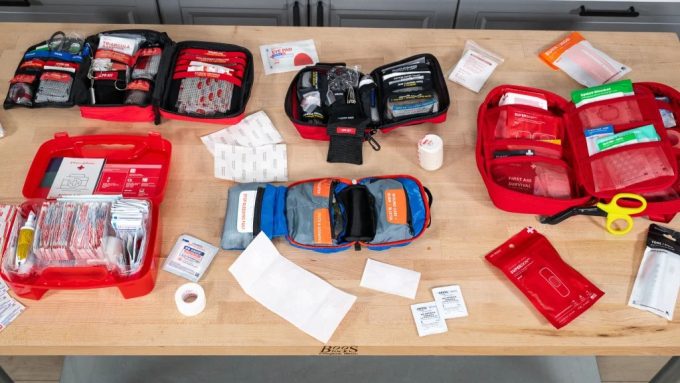
You have two good options: buy a pre-assembled kit and personalize it, or build one from scratch so it matches exactly what you and your group need. Both work. Let’s cover both.
Buy It or Build It?
There’s nothing wrong with a store-bought kit, and for a lot of people it’s the smarter choice.
Why buy a pre-assembled kit
- It’s fast and convenient — order online, and it shows up ready to go.
- It takes the guesswork out. Reputable kits come stocked with sensible quantities and the right range of bandage sizes.
- It often includes items that are easy to forget or hard to source individually, like a CPR face shield, wound-closure strips, or a properly sized splint.
- You can buy a few small ones cheaply and give everyone in the group their own.
Why build your own
- You control the container, the contents, and the quality of each item.
- You’ll always know exactly where everything is — useful when you’re looking for one specific thing under stress.
- You can build around your group’s real medical needs rather than a generic “average.”
- Over time it’s often cheaper to refill individual items than to replace whole kits.
A popular middle path: buy a quality base kit, then customize it. Add your prescriptions, swap in items for your specific activity, and remove anything you’ll never use. You get convenience plus personalization.
How to Build (or Upgrade) Your Kit
Before you start dropping supplies into a bag, think about the kit as a system, not a pile of stuff.
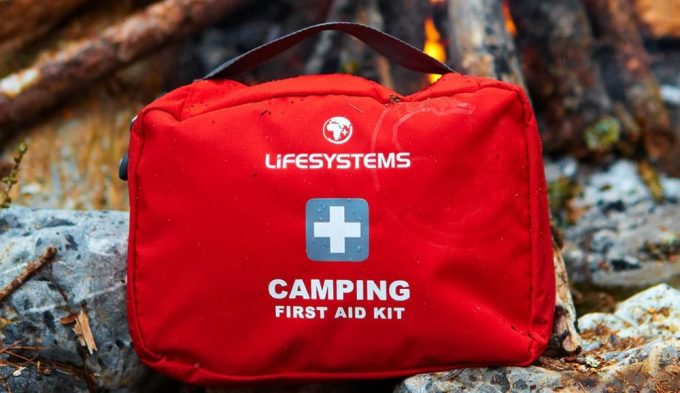
Choose the right container. It should be big enough to hold everything with a little room to spare, durable, and waterproof. A hard case protects fragile items; a soft pouch packs lighter. Either way, line it with a dry bag or heavy-duty zip-lock so a creek crossing or a night of rain doesn’t ruin your supplies. A bright color (red is the classic) makes it easy to spot in a hurry.
Organize by category, not chaos. Group items so you can find them fast: wound care in one pouch, medications in another, tools in a third. Many modern kits use labeled, color-coded compartments for exactly this reason. Keep the everyday stuff (bandages, blister care, pain relief) easy to reach, and keep emergency gear (tourniquet, trauma dressing) protected but identifiable.
Store it well between trips. Keep the kit somewhere cool, dry, and out of direct sunlight. Heat and humidity degrade medications, adhesives, and ointments faster than you’d expect.
Make it findable and usable by everyone. At camp, put the kit somewhere accessible and tell every person in your group where it is. A kit nobody can find, or nobody knows how to use isn’t doing its job.
Check it before every trip. Confirm nothing is expired, and restock anything you used last time. More on maintenance below.
The 2026 Camping First Aid Kit Checklist
Here’s a comprehensive list. You won’t need every single item for an overnight in a developed campground, but this is the full menu to choose from. Items marked (new/upgraded) reflect current best-practice recommendations that have shifted in recent years.
Wound Care
- Adhesive bandages (assorted sizes)
- Sterile gauze pads (several sizes)
- Non-adherent dressings for burns and scrapes
- Wound-closure / butterfly strips
- Elastic wrap bandage (for sprains and support)
- Medical/adhesive tape
- Sterile saline or a wound-irrigation method (new/upgraded), for flushing out dirt and debris (see the technique note below)
- Antibiotic ointment (e.g., a triple-antibiotic ointment)
- Antiseptic wipes — for cleaning around a wound and for hands, not for pouring into open wounds
- Hydrocortisone cream (itch, rashes, bites)
- Burn gel or aloe gel
- Blister care (moleskin or hydrocolloid blister pads)
Tools & Equipment
- Trauma shears or small scissors
- Fine-point tweezers (for splinters and ticks)
- Tick-removal tool (new/upgraded) — tick ranges are expanding, so this earns its place
- Thermometer
- Splint (a moldable SAM-style splint is compact and versatile)
- Instant cold pack
- Safety pins
- Irrigation syringe (doubles for flushing wounds and rinsing eyes)
- Disposable non-latex gloves
- CPR face shield / one-way valve mask (new/upgraded) — now a standard inclusion
- Tourniquet (new/upgraded) — once considered hunting-only gear, a commercial windlass tourniquet is now recommended for any remote trip in case of severe bleeding (learn how to use it first)
- Emergency / space blanket (new/upgraded) — for shock, hypothermia, or signaling
- Hand sanitizer
- Duct tape (a short roll fixes gear and improvises dressings or splint padding)
- A first-aid reference guide or the offline Red Cross First Aid app
Medications
- Pain / fever relief — ibuprofen (Advil, Motrin) and acetaminophen (Tylenol); bring child doses if kids are along. Note: acetaminophen is called paracetamol in the UK and Australia (e.g., Panadol).
- Antihistamine — for allergic reactions and itching
- Anti-diarrheal medication
- Antacids
- Oral rehydration salts / electrolyte packets — for dehydration, heat, and stomach bugs
- Oral glucose tablets — for low blood sugar
- Insect-bite and sting relief
- Sunburn relief (aloe)
- Eye drops
- Personal prescription medications (with extras — see below)
Trip-Critical & Personal Items
- EpiPen / epinephrine auto-injector if anyone in the group has severe allergies (and make sure others know where it is and how to use it)
- Asthma inhalers and any other specialized meds
- Insect repellent and sunscreen
- Any maintenance medication (insulin, heart medication, etc.) plus a backup supply
- Monitoring gear if relevant (blood glucose or blood pressure monitor)
- A written card with allergies, conditions, medications, emergency contacts, and the nearest hospital/clinic
Communication & Rescue (the biggest 2026 upgrade)
This category barely existed in older camping guides and is now arguably the most important addition for remote trips.
- A fully charged phone plus a power bank — and check whether your phone supports satellite SOS for areas with no cell coverage
- A satellite messenger or personal locator beacon (PLB) for genuinely remote or off-grid trips — these can summon rescue when there’s no signal
- A whistle (three blasts is the universal distress signal) and a signal mirror
- Headlamp or flashlight, with spare batteries
- A printed map and the location of the nearest medical facility, since electronics fail
- The local emergency number written on your medical info card — 911 in the U.S., 000 in Australia, 999 or 112 in the UK
Printable Quick Checklist
Copy this into your notes or print it for the inside lid of your kit.
WOUND CARE
[ ] Assorted adhesive bandages
[ ] Gauze pads (multiple sizes)
[ ] Non-adherent burn dressings
[ ] Wound-closure / butterfly strips
[ ] Elastic wrap bandage
[ ] Medical tape
[ ] Sterile saline / irrigation syringe
[ ] Antibiotic ointment
[ ] Antiseptic wipes (skin & hands)
[ ] Hydrocortisone cream
[ ] Burn / aloe gel
[ ] Blister pads / moleskin
TOOLS
[ ] Trauma shears / scissors
[ ] Tweezers
[ ] Tick-removal tool
[ ] Thermometer
[ ] Splint
[ ] Instant cold pack
[ ] Gloves (non-latex)
[ ] CPR face shield
[ ] Tourniquet
[ ] Emergency blanket
[ ] Hand sanitizer
[ ] Duct tape
[ ] First-aid guide / app
MEDICATIONS
[ ] Pain / fever relief (adult + child)
[ ] Antihistamine
[ ] Anti-diarrheal
[ ] Antacids
[ ] Oral rehydration / electrolytes
[ ] Glucose tablets
[ ] Bite & sting relief
[ ] Eye drops
[ ] Personal prescriptions (+ extras)
PERSONAL / CRITICAL
[ ] EpiPen (if needed)
[ ] Inhalers / specialized meds
[ ] Insect repellent + sunscreen
[ ] Medical info card
COMMS & RESCUE
[ ] Phone + power bank (check satellite SOS)
[ ] Satellite messenger / PLB (remote trips)
[ ] Whistle + signal mirror
[ ] Headlamp + spare batteries
[ ] Printed map + nearest hospital
What’s Changed: First-Aid Practices to Update
If you learned first aid a while ago, a few habits are worth retiring.
Skip the hydrogen peroxide and iodine on open wounds. This is the biggest change. Major health bodies now advise against pouring hydrogen peroxide, iodine, or rubbing alcohol into a wound. They damage healthy tissue and can actually slow healing. The current advice is to rinse the wound with plenty of clean, drinkable water or sterile saline until debris is gone, remove anything stubborn with clean tweezers, apply a thin layer of antibiotic ointment or plain petroleum jelly, and cover it.
Antiseptic wipes are still useful for cleaning your hands and the skin around the wound just not inside it.
Carry a tourniquet, and learn to use it. Modern guidance treats life-threatening bleeding as something worth preparing for on any remote trip, not just hunting trips. A proper commercial windlass tourniquet (not an improvised one) can stop severe arterial bleeding
It’s only as good as your training, so take a “Stop the Bleed” or wilderness first-aid course. Courses can be done online.
Know how to spot and respond to environmental emergencies. Heat exhaustion, dehydration, hypothermia, and altitude sickness are common outdoor injuries that don’t involve a single bandage. Learn the early warning signs; recognizing them quickly matters more than any item in your kit.
Plan your call for help before you need it. Know your evacuation options, whether you have signal, and how your satellite SOS or beacon works before you leave the trailhead.
A quick note: this guide is general information, not medical advice. For anything beyond minor injuries, get professional medical help, and take a hands-on first-aid course so you can actually use what you’re carrying.
Tailor the Kit to Your Trip
Your kit should match your plan. A few adjustments by activity:
- Hunting: Add supplies for penetration wounds — extra trauma dressings, a tourniquet (now baseline anyway), and a space blanket to manage shock.
- Fishing: Add a fish-hook removal technique and the right tools; barbed hooks are a classic camp injury.
- Mountaineering / high altitude: Carry altitude-sickness medication and know the symptoms.
- Bushwhacking / dense terrain: Pack extra gauze, bandages, and adhesive bandages — scrapes add up fast.
- Water-based trips (kayak, canoe, boating): Double down on waterproofing; store everything inside a dry bag.
- Snake country: Protocol differs by region, and getting this wrong matters.
- In the U.S., for native pit vipers (rattlesnakes, copperheads, cottonmouths), do not apply a tourniquet, ice, or a tight pressure bandage and do not try to cut or suck out venom, keep the person calm and still, remove rings and tight clothing, keep the bite below heart level if possible, and get to a hospital fast.
- In Australia, the protocol is the opposite for its native snakes: apply a broad pressure-immobilisation bandage and splint the limb.
- The UK (the adder is its only venomous snake) follows the keep-still-and-seek-help approach. Whatever region you’re in, know the correct technique before your trip and where the nearest antivenom-equipped hospital is.
Size It to Your Group and Duration
More people means more supplies. A useful rule of thumb from the American Red Cross is roughly 25 adhesive bandages for a group of four, scaling up from there. The same logic applies to gloves, gauze, and medications.
Longer trips need deeper stock. If you’ll be out for a week with no resupply, your kit has to cover the whole stretch, you can’t pop back to a pharmacy. Even for a single overnight, bring a complete kit; injuries don’t wait for convenient timing.
Solo still counts. Even camping alone, carry a full kit and make sure it includes your own prescription medications.
For groups, it’s efficient to designate one person as the “medical lead” who owns the main kit and knows its contents, while others carry smaller personal kits. That avoids four identical kits taking up space and one person quietly carrying nothing.
Personalize It
This is where a homemade kit shines. A generic store kit assumes an “average” camper who doesn’t exist.
- Include everyone’s prescription and maintenance medications, plus backups. Insulin, heart medication, and similar drugs should travel with the kit, not in a forgotten pocket.
- Account for different needs across the group. A medication that’s perfectly safe for one person may be one another is allergic to. On a family trip, plan for each member individually — adults, kids, and elders all differ.
- If you’re camping with older adults or anyone with a chronic condition, consider monitoring tools (blood pressure or glucose monitors) and keep their physician’s number, plus the nearest hospital and pharmacy, on hand.
- An EpiPen may never get used — but if someone has a severe allergy, it’s the difference between a scare and a tragedy.
The goal is simple: everyone who comes camping with you has what they specifically need.
Maintain It
A kit is only useful if it’s ready when you reach for it.
- Inspect before every trip, and do a thorough check at least every few months.
- Replace expired items — most medications and ointments last two to three years, but heat and humidity shorten that.
- Restock immediately after use, not “next time.” Next time is when you’ll discover the bandages are gone.
- Keep an inventory list taped inside the lid, with contents and expiry dates. A phone photo of the fully stocked kit makes it easy to spot what’s missing.
- Refresh the whole kit every three to five years, even if items look untouched — adhesives degrade and sterile packaging loses integrity over time.
Why It All Matters
A first aid kit puts everything you need to treat an injury in one place, easy to find under pressure. Out in the wilderness, even a minor problem a deep cut, a high fever, a bad allergic reaction carries higher stakes simply because help is farther away. Having supplies on hand buys you time to stabilize someone and get them to real care.
Kids especially get into scrapes, cuts, and burns just by being kids; quick access to relief keeps a small injury from derailing the whole trip. And nature doesn’t always cooperate — sudden storms, falls, and the unexpected are part of being outdoors.
But the kit is only half of it. The other half is knowing how to use it. A tourniquet you’ve never practiced with, or a CPR mask in the hands of someone who’s never trained, won’t help much in a crisis. Take a basic first aid and CPR course — or a wilderness first aid course if you’re a frequent or remote camper. In the U.S., the American Red Cross and NOLS Wilderness Medicine are the go-to providers, and a free “Stop the Bleed” class will teach you tourniquet and bleeding control.
In the UK and Australia, St John Ambulance offers the same core training. That knowledge is the single most powerful thing in your pack.
Pack well, train up, and you can relax and enjoy the trip knowing you’re ready if something goes sideways. Better to have it and not need it than need it and not have it.
Have something you always add to your kit that’s not on this list? It’s worth keeping your own running notes after each camping trip — your real-world experience is the best guide to what your kit actually needs.

Daniel is a gear freak when it comes to hiking, climbing and camping. He went to REI Outdoor School to meet new people and learn best practices. Don’t even try to argue with him about the latest backpack or ice axe, he tried most of them. Daniel’s dream is to climb Mount Everest.
I used to buy first aid kits from the store but this is a mistake; you should build it yourself. This way, you will be familiar with everything in the kit, and how to use it. Review what is in it and where it is every camping season. You have to decide what you will likely need to treat and then equip yourself to the best of your abilities.
Personalizing your first aid kit is a must. There are premade kits that you can also add your stuff to if you lack the time to build from scratch.
A first-aid kit is with us at fun and safer trips. The contents of our kit changed as we discover what we really needed. I think the advantages it had for me is what I learned from comparing the products we only need to include in the kit. The article gave me a better insight of everything I needed to know about a first-aid kit.
It’s more economical to “build” your own first aid kit. First, you can customize it to your hearth’s contents, which is pretty awesome!
It’s more economical to “build” your own first aid kit. First, you can customize it to your hearth’s contents, which is pretty awesome!